Exclude certain drives from Initial Full System Scan
To temporarily unmount the drives
-
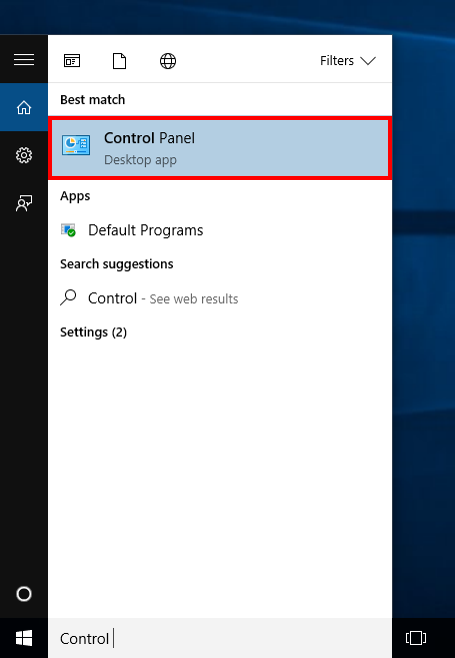
Open the Start menu. Click the Start (
 ) button in the lower-left corner of your screen.
 -
Search for Control Panel in the Windows Search Box. The Control Panel window will be displayed on-screen.
-
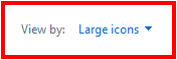
In the top-right corner of the screen, select View by: Large icons.
-
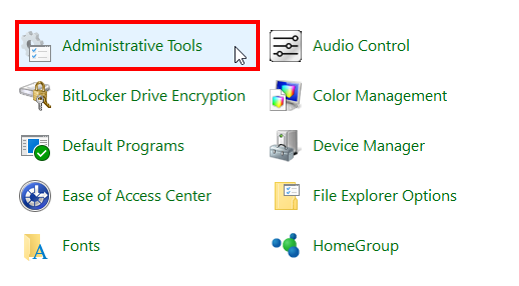
Select Administrator Tools.
-
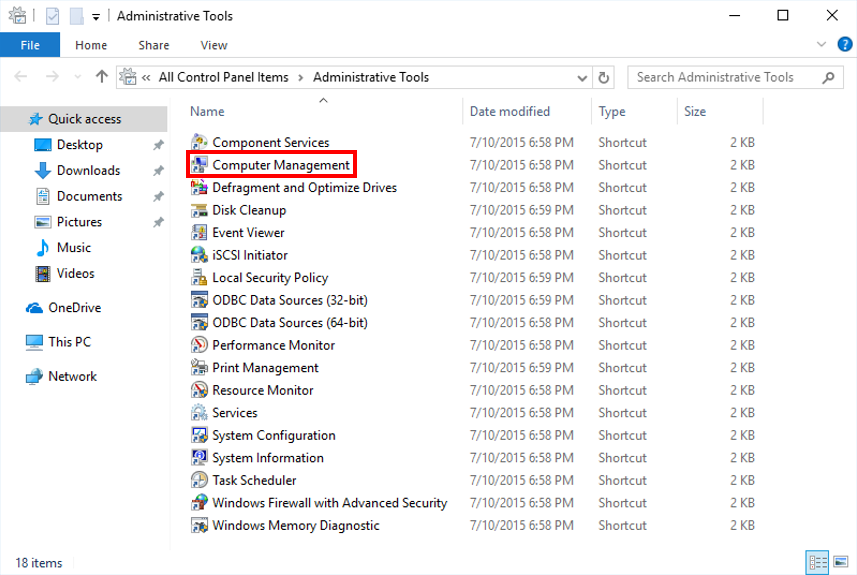
Select Computer Management.
-
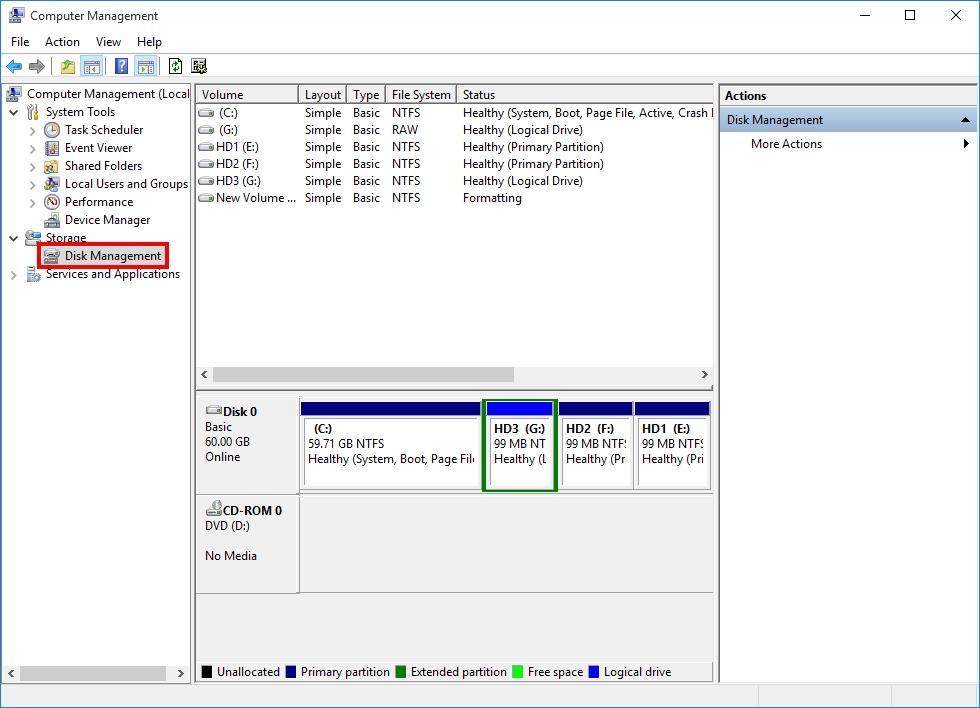
Under Storage in the left pane, click on Disk Management.
-
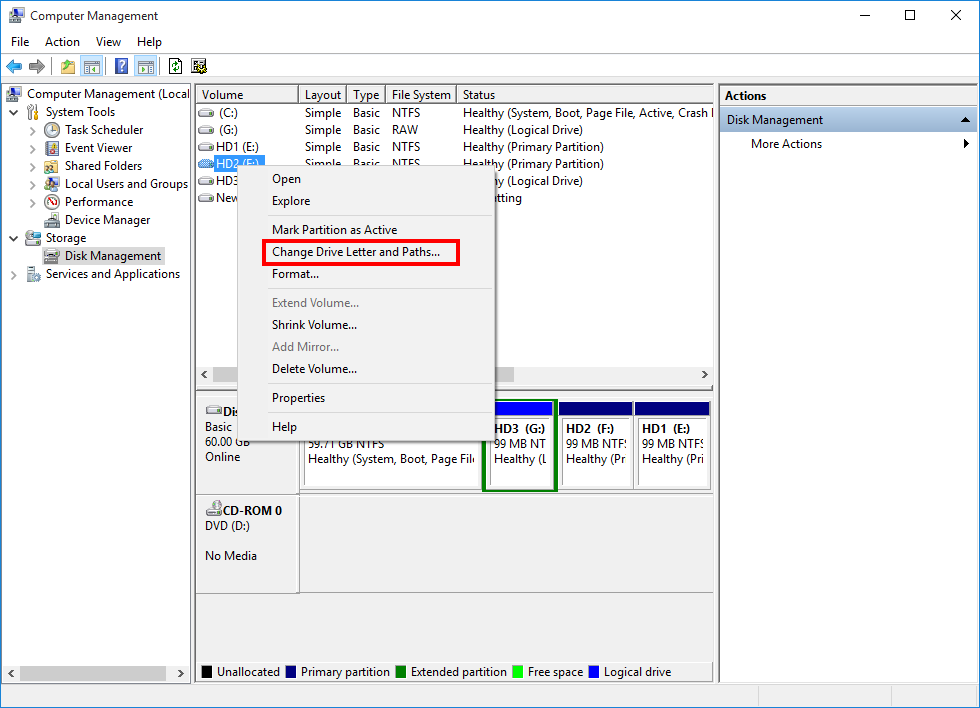
Right-click on the volume you want to exclude from the initial full system scan, and choose Change Drive Letter and Paths.
-
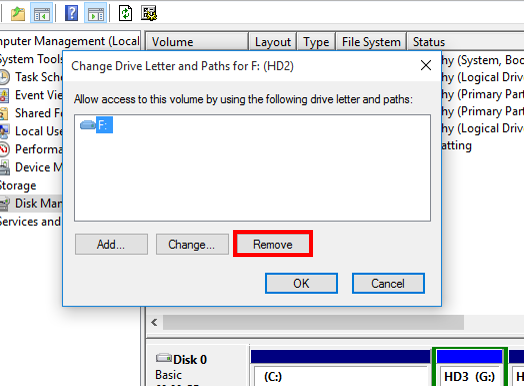
Click Remove, then select Yes when asked to confirm that you want to dismount the volume. The volume you selected will now be dismounted.
-
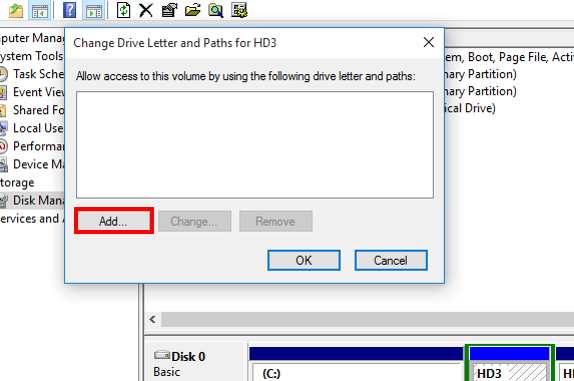
After Initial Full System Scan completed, you can mount the drive back, by clicking on Add, then select OK when asked to assign a drive letter.
Note: By doing this, the files inside the drives will also not be allowlisted. After full system scan is completed, if there is any executable inside these drives, the file may get blocked if it tries to run.
Support and feedback
Should you encounter any issues using CatchPulse with any of the mentioned or missed requirements above, you can write to us at docs@secureage.com.
This page was last updated: April 29, 2026