Troubleshoot a computer that doesn't boot up
Here are some troubleshooting steps to take when your computer doesn’t boot up.
Windows 7
-
Download the following and save it to your removable flash disk:
-
Turn your computer on and press F8 repeatedly until the Boot Options menu displays. Next, select Safe Mode → Command Prompt.
-
When you see the command prompt, insert your removable Flash disk.
-
In Command Prompt, type the following commands and hit Enter.
-
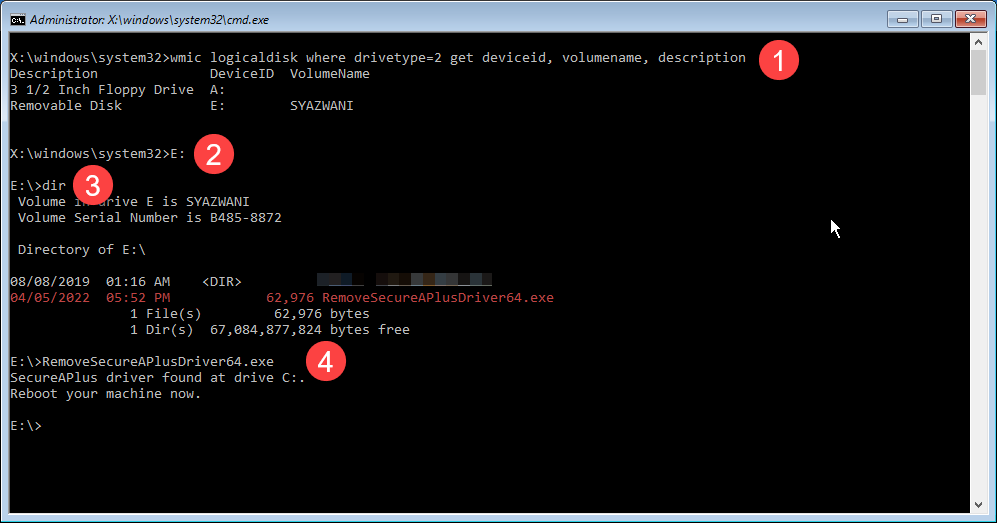
Find out the drive letter of your USB removable disk. Type
wmic logicaldisk where drivetype=2 get deviceid, volumename, description
This lists the removable disks connected to the computer.
Note: The above command shows, for example, all removable drives. To select a different type of drive, you have to use another value instead of the 2. An overview of the possible values/ drive types can be found below:
0 → Unknown
1 → No Root Directory
2 → Removable Disk
3 → Local Disk
4 → Network Drive
5 → Compact Disc
6 → RAM Disk -
Type the drive letter of the desired drive, followed by a colon, e.g.
C:, D: -
To browse all the root contents of the drive, type
dircommand. -
For 32-bit OS, type RemoveSecureAPlusDriver.exe and press Enter.
For 64-bit OS, type RemoveSecureAPlusDriver64.exe and press Enter.
-
-
Reboot your computer.
Windows 10
-
Download the following and save it to your USB removable disk:
-
In Windows 10, pressing the F8 key on your keyboard no longer works to enter the Safe Mode. Nonetheless, to enter Safe Mode in Windows 10, you can use one of the methods below.
-
Use Media Creation Tool to create bootable Windows 10 Installer. Boot your Windows 10 computer from it and wait for the installation environment to load.
-
If you have a Windows installer ISO image, you can use Rufus to create a bootable USB. To boot to USB, press F12, and it'll provide you with a boot up menu to choose from which device you want to boot from.
-
-
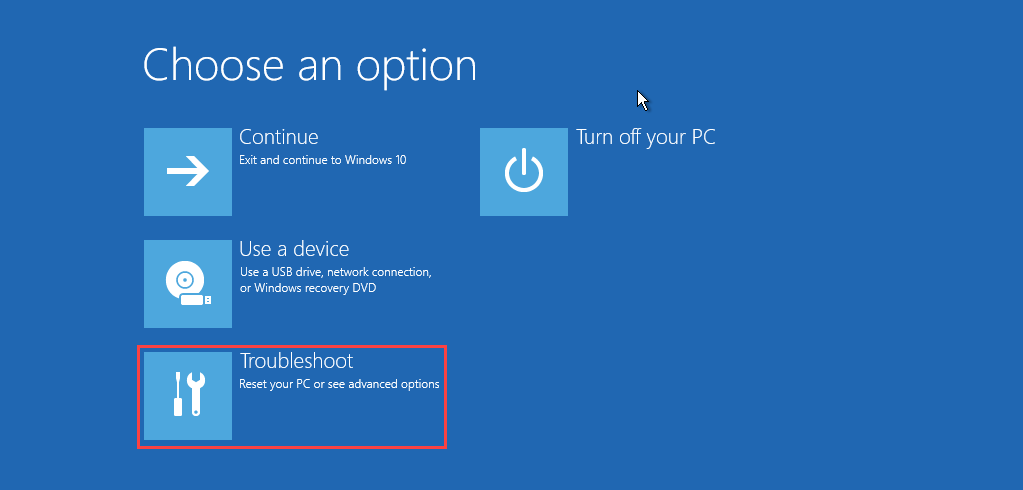
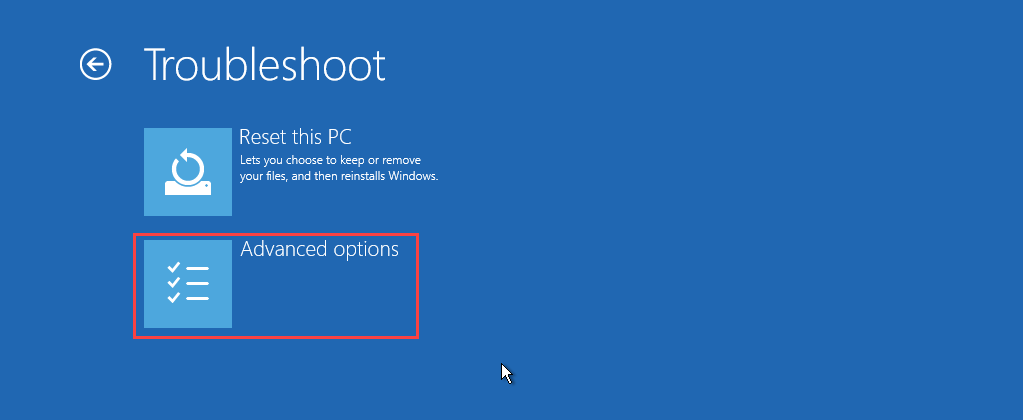
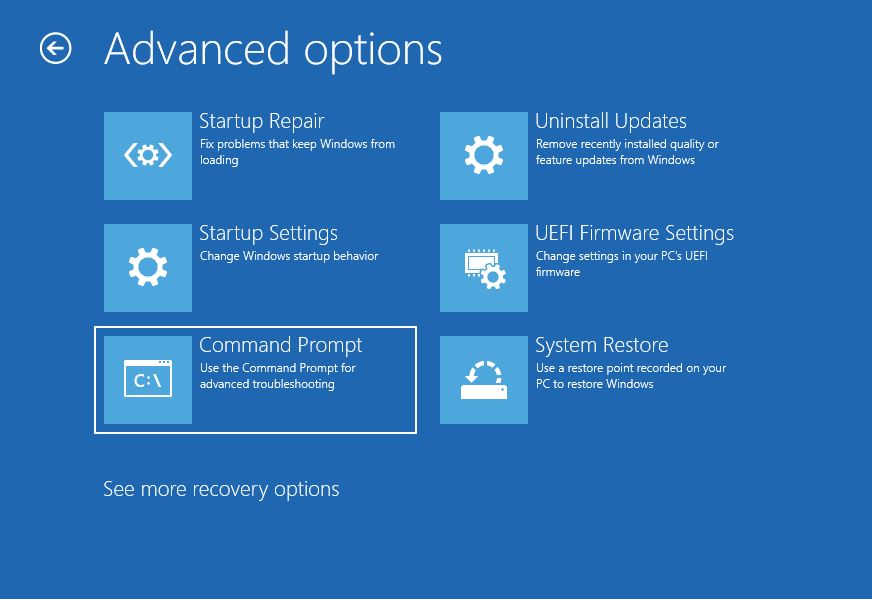
After PC restarts to the Automatic Repair screen, select Advanced Options → Troubleshoot → Advanced options → Command Prompt.
-
In Command Prompt, type the following commands and hit Enter.
-
Find out the drive letter of your USB removable disk. Type
wmic logicaldisk where drivetype=2 get deviceid, volumename, description
This lists the removable disks connected to the computer.
Note: The above command shows, for example, all removable drives. To select a different type of drive, you have to use another value instead of the 2. An overview of the possible values/ drive types can be found below:
0 → Unknown
1 → No Root Directory
2 → Removable Disk
3 → Local Disk
4 → Network Drive
5 → Compact Disc
6 → RAM Disk -
Type the drive letter of the desired drive, followed by a colon, e.g.
C:, D: -
To browse all the root contents of the drive, type
dircommand. -
For 32-bit OS, type RemoveSecureAPlusDriver.exe and press Enter.
For 64-bit OS, type RemoveSecureAPlusDriver64.exe and press Enter.
-
-
Reboot your computer.
Alternative
-
If you don't have a Windows installer ISO image, create a Linux bootable USB instead. When using Linux, go to the following folder in the partition where your Windows is located:
/Windows/System32/drivers. -
Find a file name
saappctl.sysand rename the file tosaappctl.sy_, for example.
Support and feedback
Should you encounter any issues using CatchPulse with any of the mentioned or missed requirements above, you can write to us at docs@secureage.com.
This page was last updated: December 02, 2025


