Set applications as restricted applications
By default, SecureAPlus is set to trust files as a trusted installer based on their digital signature and allow an application with a valid digital signature to be trusted as an installer if its certificate name is found in the Trusted Certificate list. Hence, some applications can be promoted into a Trusted Installer without prompting the user. By adding the application in the Restricted Applications list, it will not automatically bring in other applications that may potentially harm the user’s system.
Learn More How to Manage my Application Whitelisting mode using Digital Signature
Example: Google Chrome can download, extract or copy files from external sources and some of the files may be harmful to the system. If you are downloading a new installer using Google Chrome, Google Chrome can be automatically set to trusted installer without any permission from the user as Google Chrome is signed and trusted. Hence, everything that Google Chrome has created will automatically be trusted. To avoid that, you have to set chrome.exe as a restricted application in the Restricted Applications List.
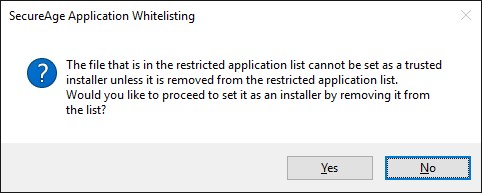
In the Restricted Applications tab, you can choose to set the application as a restricted application (trusted application with restrictions) in which any new files created by it will not be automatically trusted.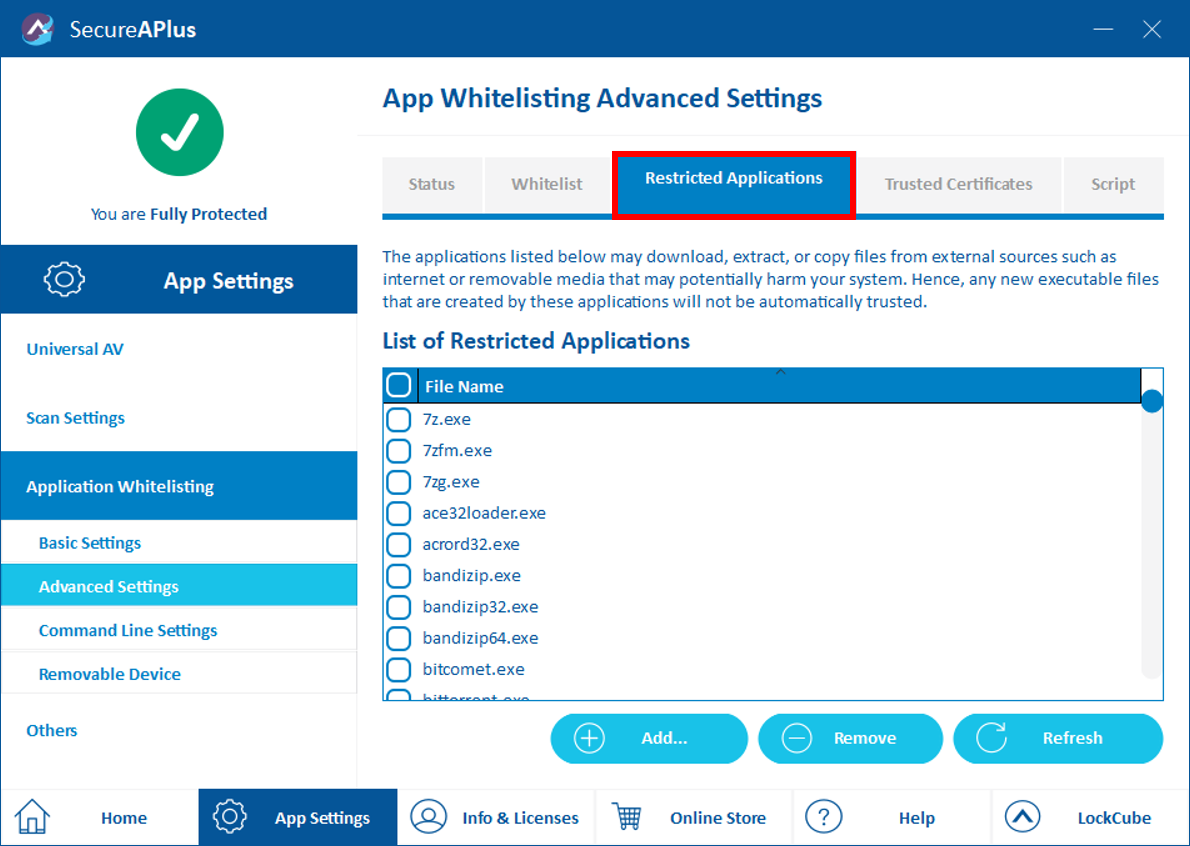 Restricted Application cannot be set to Trusted Installer without removing it from the restricted application list. If you try to set to Trusted Installer, you will receive a prompt as shown below:
Adding a restricted application
To add a restricted application
-
Launch SecureAPlus → App Settings → Application Whitelisting → Advanced Settings
-
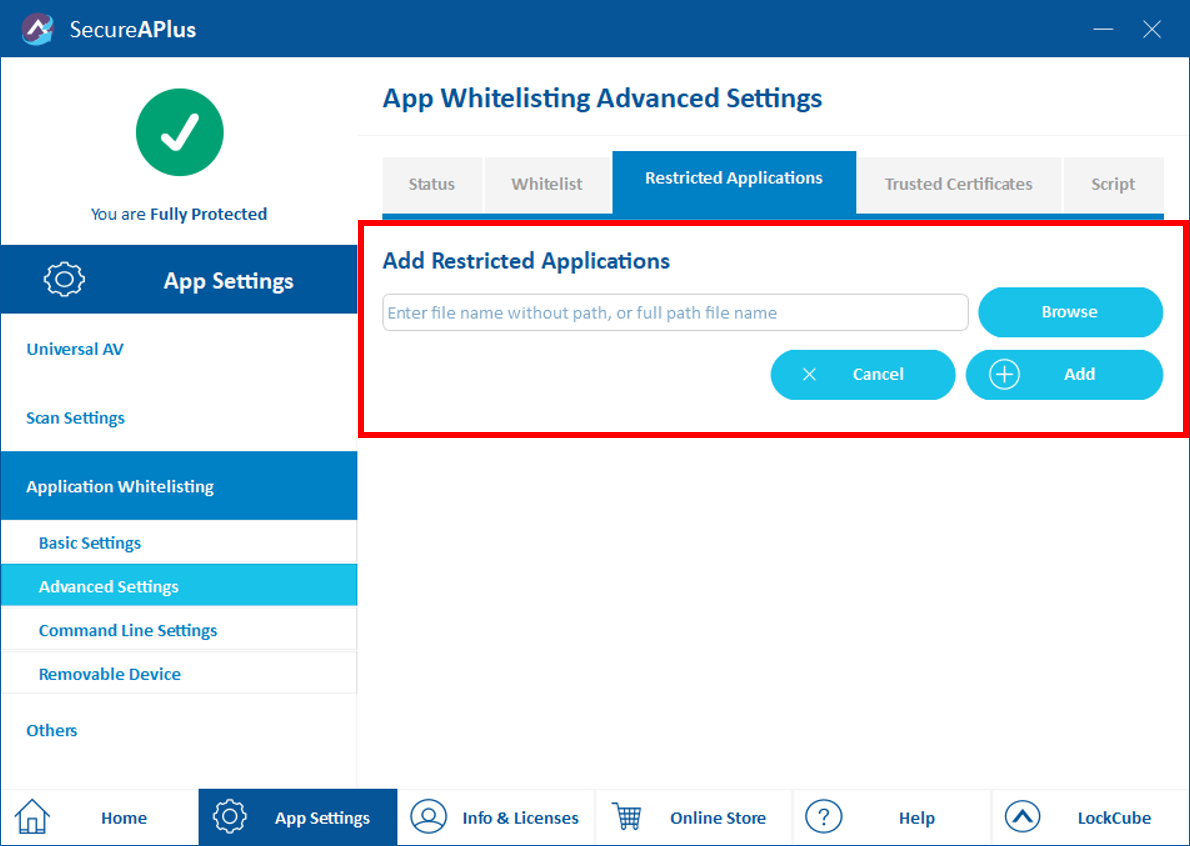
In the Restricted Applications tab, click the Add button.
-
In Restricted Applications window, click on Browse to select the restricted application executable or enter the file name without path, or full path file name. Then click Add, otherwise, click Cancel to exit the Add Restricted Application window.
-
The newly added restricted application will be added to the list.
Editing a restricted application
To edit a restricted application
-
Launch SecureAPlus → App Settings → Application Whitelisting → Advanced Settings
-
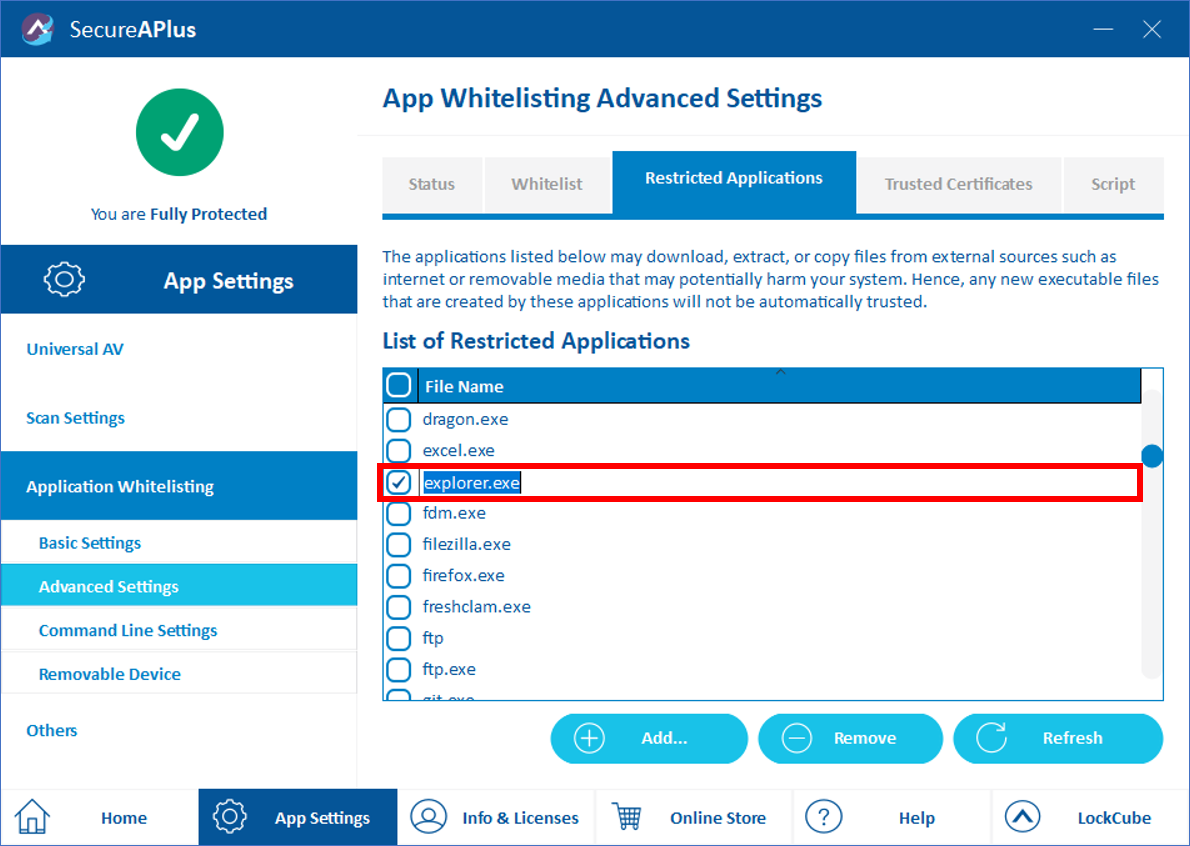
In the Restricted Applications tab, select a restricted application from the list and double-click on it till you see a text box. Make necessary changes and hit the Enter key.
Removing a restricted application
To remove a restricted application
-
Launch SecureAPlus → App Settings → Application Whitelisting → Advanced Settings
-
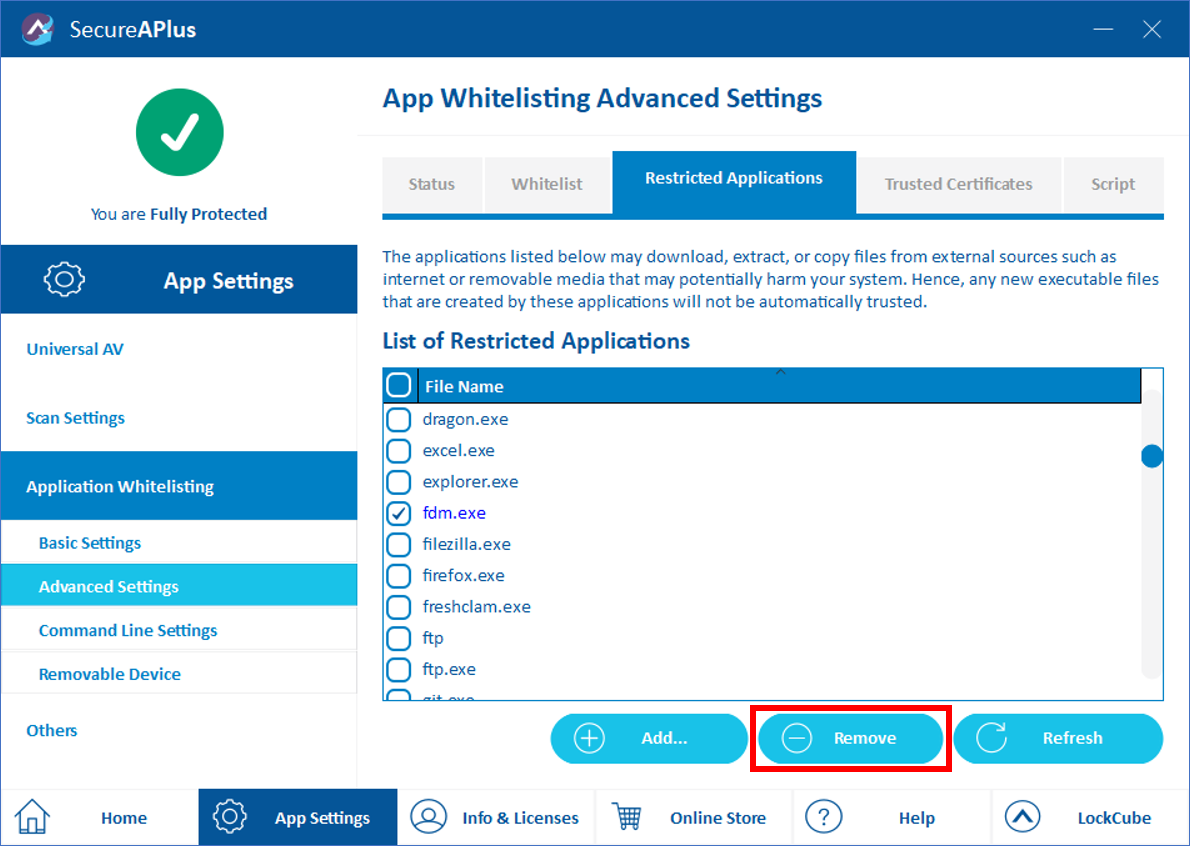
In the Restricted Applications tab, check on the restricted application from the list that you want to remove and click the Remove button
Refreshing a restricted application
To refresh a restricted application
-
Launch SecureAPlus → App Settings → Application Whitelisting → Advanced Settings
-
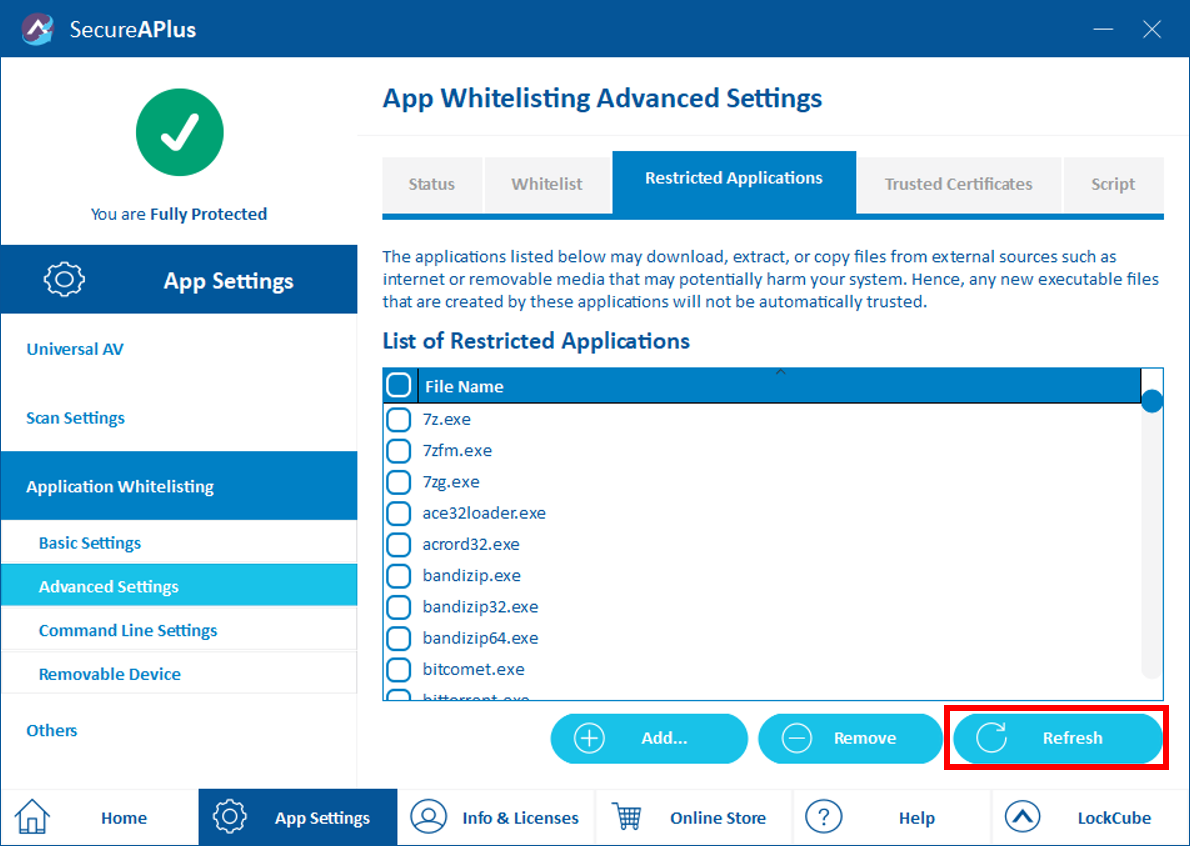
In the Restricted Applications tab, click the Refresh button.
-
The Restricted Applications list will be refreshed and updated.
This page was last updated: December 02, 2025
Support and feedback
Should you encounter any issues using SecureAPlus with any of the mentioned or missed requirements above, you can write to us at docs@secureage.com.
