Mass installation for SecureAPlus pro and essentials users
There are two methods to do mass installations of SecureAPlus using a single license code:
Method 1
-
Open your Notepad and type in the following content
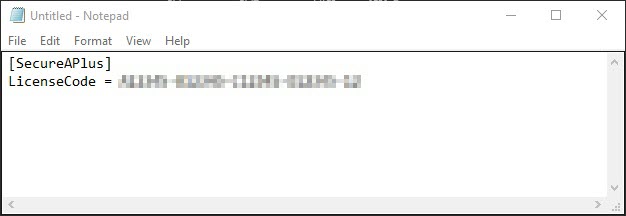
Note: LicenseCode is your license code.
-
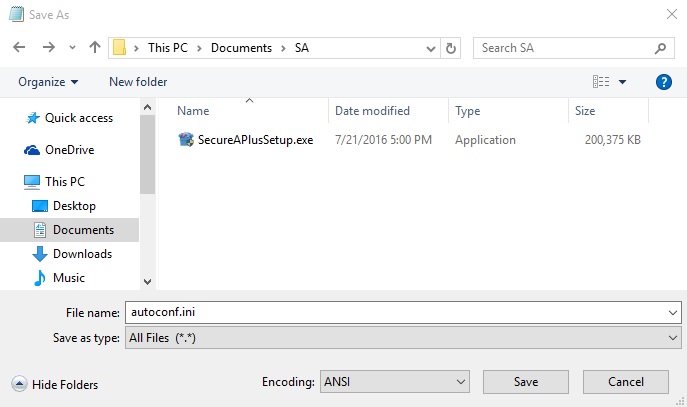
Save the file with file name autoconf.ini
-
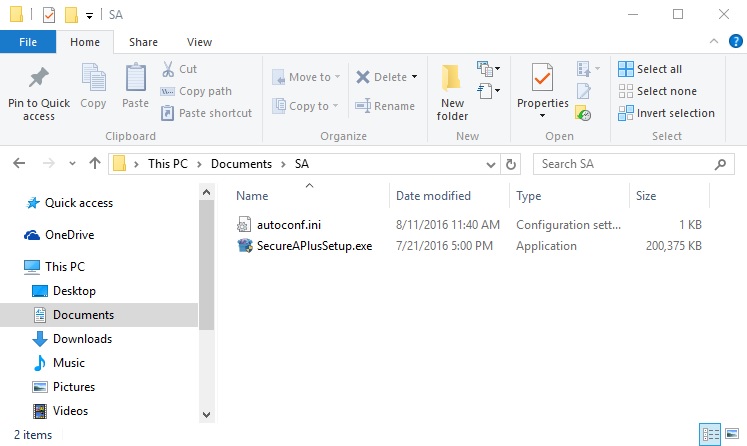
Place the autoconf.ini file in the exact same location as the SecureAPlus installer and proceed with the installation.
-
For mass installation, you can run the installer in silent mode.
Learn more about installing SecureAPlus without prompts and popups
Method 2
SecureAPlus supports the following parameter:
/autoconf <folder_where_autoconf.ini_file_located→
|
Syntax: |
SecureAPlusSetup_vx.x.x.exe /autoconf <folder_where_autoconf.ini_file_located→ |
|
Example: |
SecureAPlusSetup_vx.x.x.exe /S /autoconf "\\myserver\Common\SecureAge\autoconf_folder" |
Including the /S allows you to make the installation silent whereby messages and windows are not shown while installation is still in progress.
By making use of this parameter, it is possible to push SecureAPlus installation to multiple machines with the same predefined license code in autoconf.ini file by using a third party tool. Here are two ways to do so:
-
Using PDQ Deploy
-
Using GPO. GPO is a built-in solution in Windows Server edition to push software to multiple client machines without installing any agent on the client side, as long as the client is a member of the Domain Controller.
The detailed steps can be found here
Next, GPO needs MSI file. To convert SecureAPlus installer to MSI, you can use a third party Exe to MSI converter tool. The tool must support passing parameter to SecureAPlus installer.
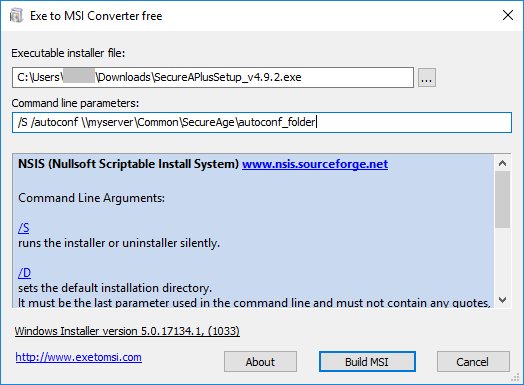
An example of the tool is: Exe to MSI Converter Free. This tool can be downloaded here.
Support and feedback
Should you encounter any issues using SecureAPlus with any of the mentioned or missed requirements above, you can write to us at docs@secureage.com.
This page was last updated: September 16, 2025