Manage file & folder or on-demand scanning
SecureAPlus automatically scans your entire computer once every 24 hours with Universal AV and has real-time protection against new possible threats that are being saved to your PC’s hard drive.
However, you can manually scan particular files and folders using Universal AV and the Offline AV with a few simple clicks.
To scan file & folders with SecureAPlus
-
Right-click the file/ folder you wish to scan and select Scan “[Name of File/Folder]”.
Alternatively, manual scanning can be accessed by launching:
C:\Program Files\SecureAge\AntiVirus\sascanner.exe
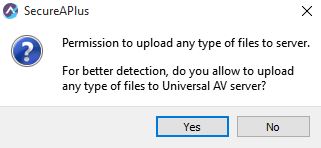
Note: If this is the first time doing a scan, SecureAPlus will prompt for permission to upload any types of files to the server for better detection.
Select Yes to allow SecureAPlus to upload any types of files including document files, else, select No to only allow SecureAPlus to upload executable files to Universal AV server.
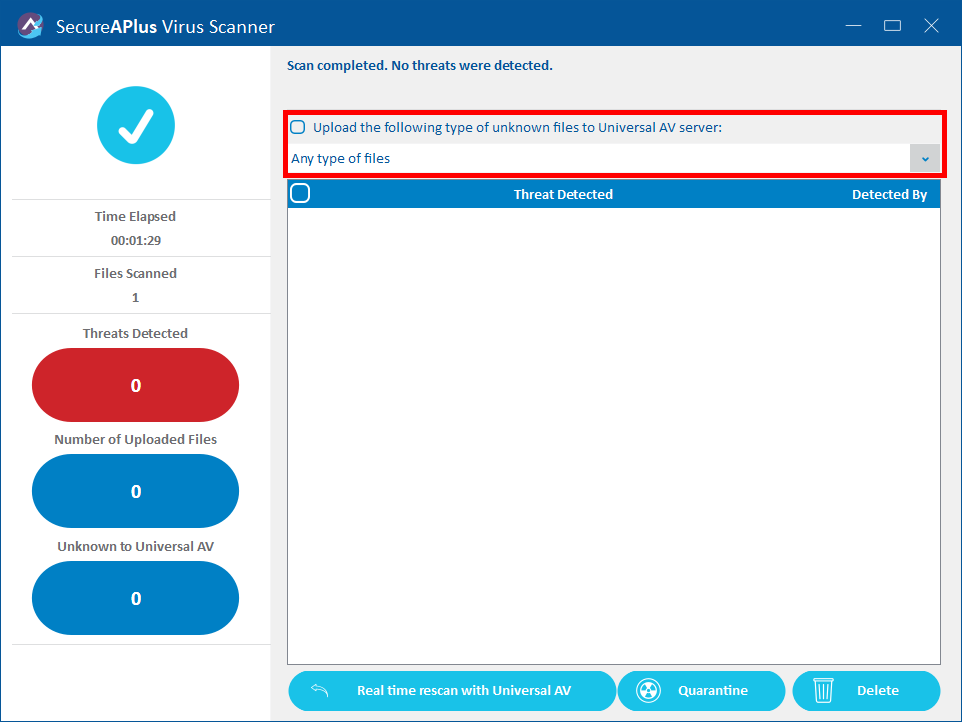
You can change this option on the SecureAPlus Virus Scanner window
-
To disable uploading of unknown files to the server, uncheck Upload the following type of unknown files to Universal AV server.
-
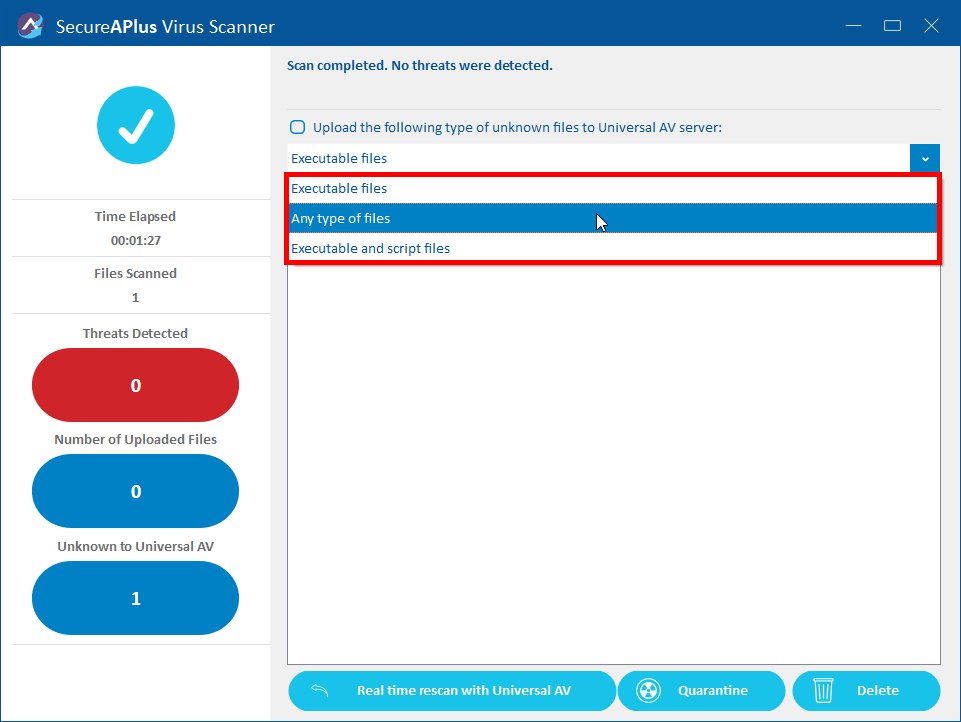
To upload only executable files to the Universal AV server, choose Executable files, or to upload any type of file, choose Any type of files.
However, do note that, if the file(s) is in the exclusion list, SecureAPlus will not upload the files to the Universal AV server.
-
-
SecureAPlus Virus Scanner window will open and begin scanning. For folders, the scan time may take longer depending on the number and size of files.
-
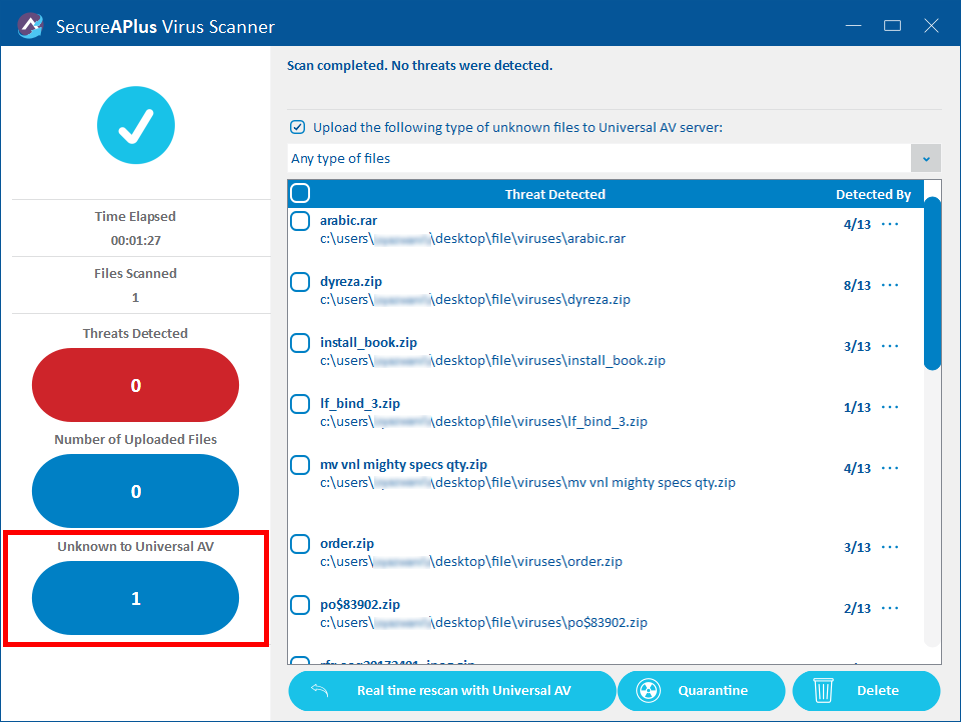
Once the scan has finished, if there are no viruses and malware detected then it will simply display that there were no threats detected.
-
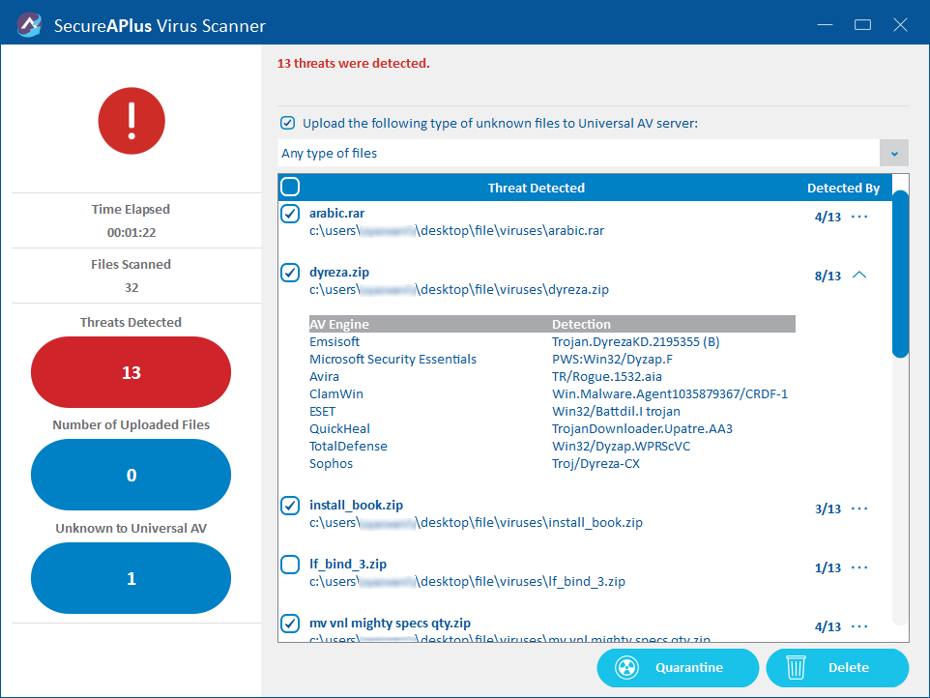
If threats are detected, the list of infected files will be shown along with information as to which of Universal AV’s engines detected the file as a malware or virus.
-
You will have the option to Quarantine or Delete the infected files.
-
You can also re-scan the files with Universal AV real-time by clicking on the Real-time rescan with Universal AV button.
-
You can click on the Number of Uploaded Files to view the details of the uploaded files.
-
Subsequently, you can also click on the number of Unknown to Universal AV to view the details of the unknown files if there are any.
Availability of Right-Click/On-Demand Scanning
File and Folder/ On-Demand Scanning uses either or both of Universal AV and Offline AV to ensure the best detection rates and availability possible.
However, this feature may be unavailable on the following scenarios:
-
When both Universal AV and Offline AV are disabled (from Scan Settings)
-
If Offline AV was not installed and there is no internet connection.
-
If only Offline AV was disabled (from Scan Settings) and there is no internet connection.
Support and feedback
Should you encounter any issues using SecureAPlus with any of the mentioned or missed requirements above, you can write to us at docs@secureage.com.
This page was last updated: December 02, 2025


