Use approved whitelist for central whitelist management
A central whitelist of applications and files can be maintained and pushed to existing and new installations of SecureAPlus Pro with the Policy Add-On. This lets privileged users (i.e. IT Administrators) to already whitelist a file or application remotely without having to launch the application on the device itself.
Adding an application or file to the approved whitelist
To add an application or file to the approved whitelist
-
Log in to your SecureAPlus portal.
-
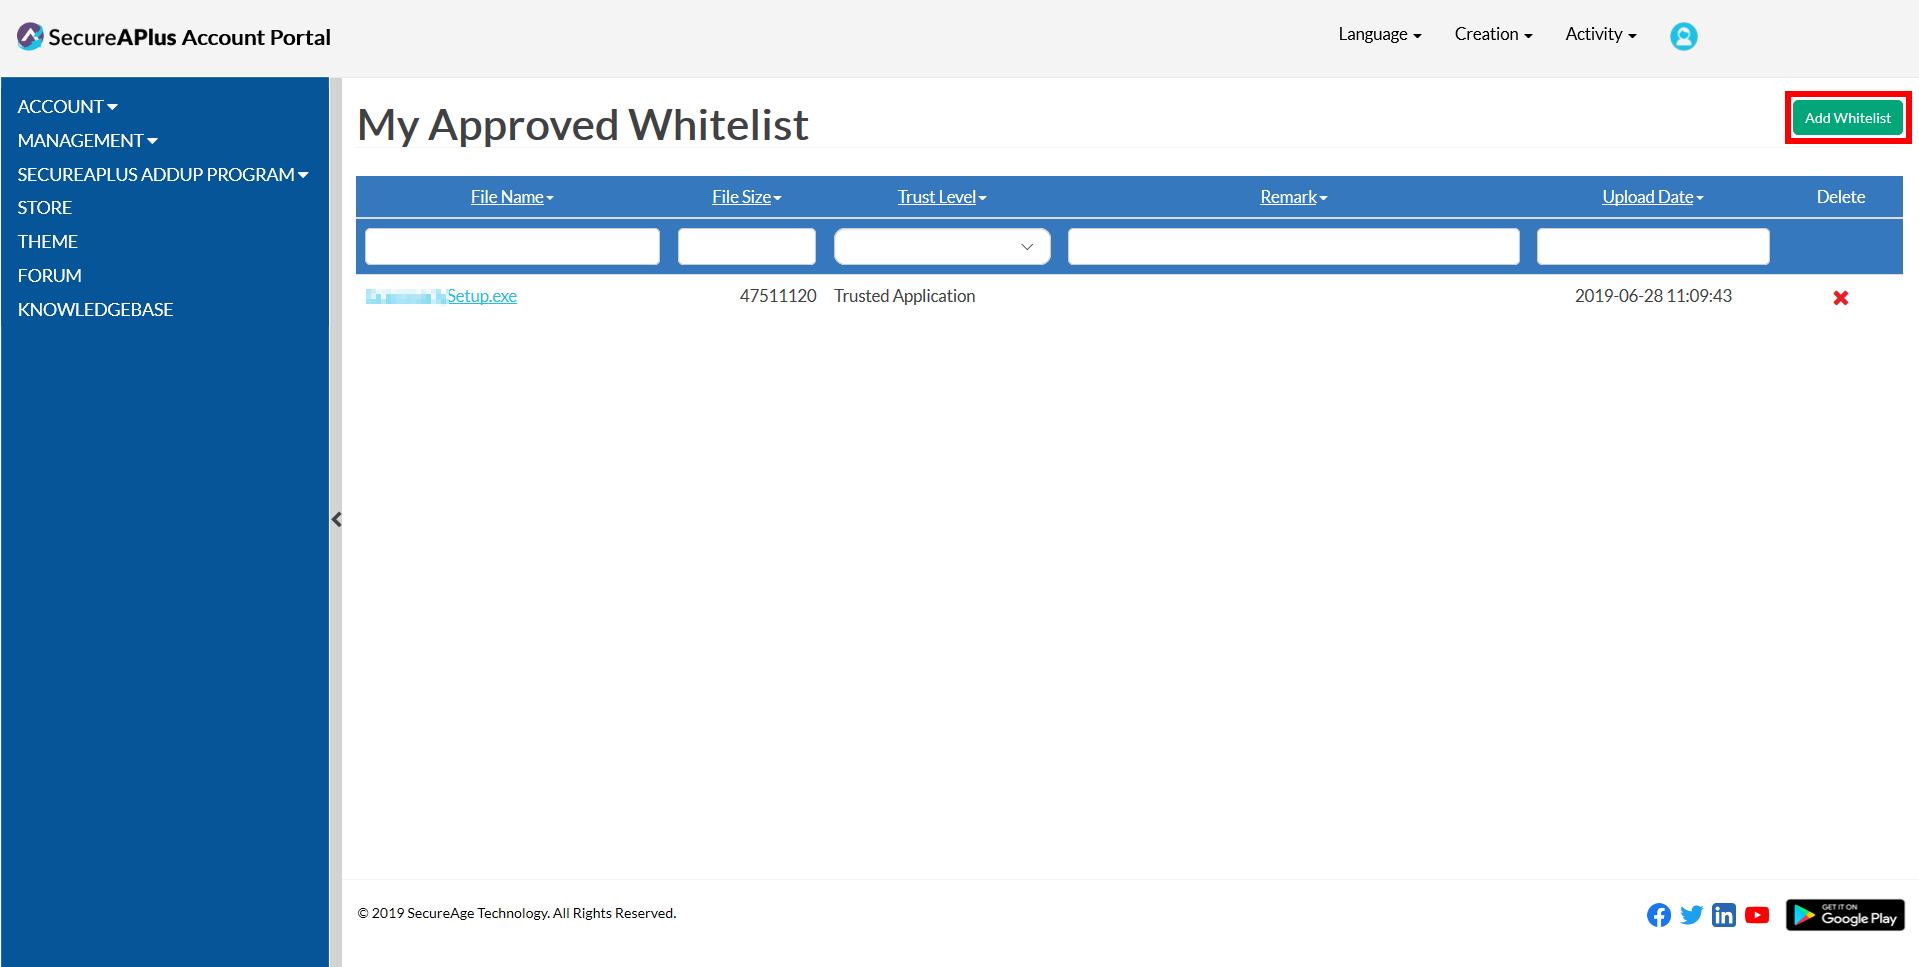
On the SecureAPlus Account Portal Summary page, click on My Approved Whitelist.
-
On the My Approved Whitelist page, you will see your list of approved whitelist.

-
Click the Add Whitelist button.
-
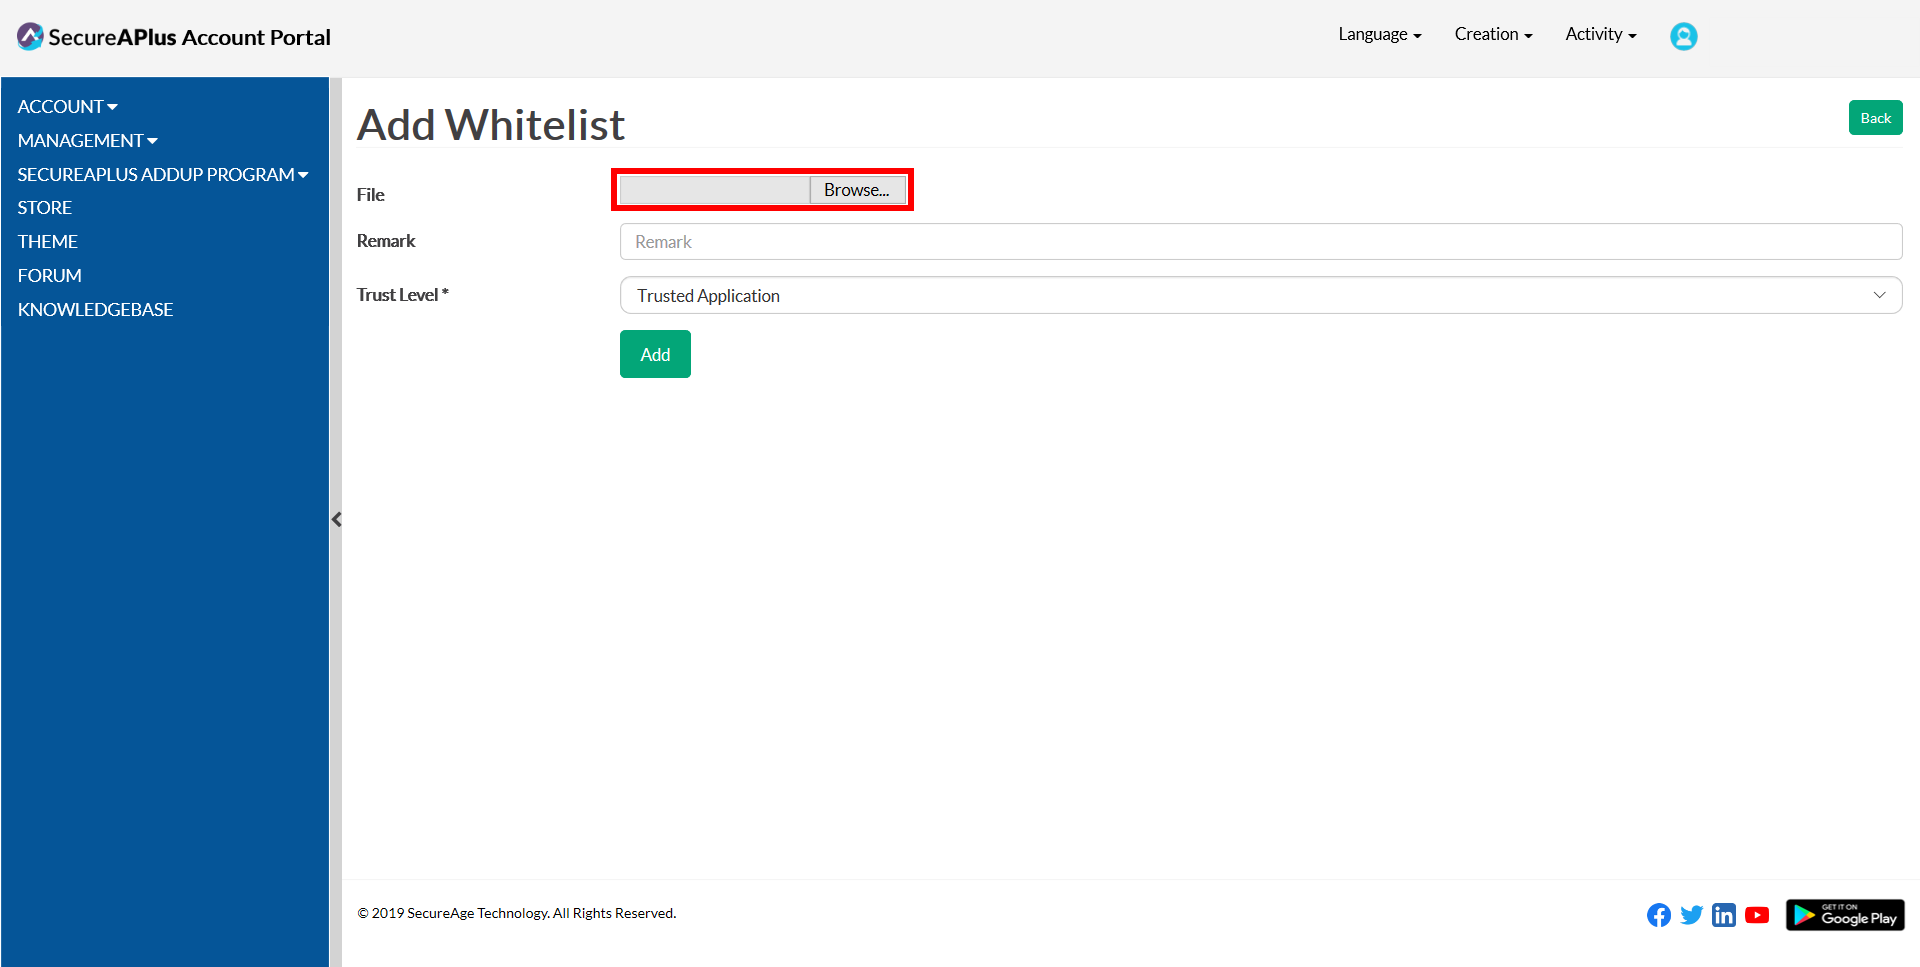
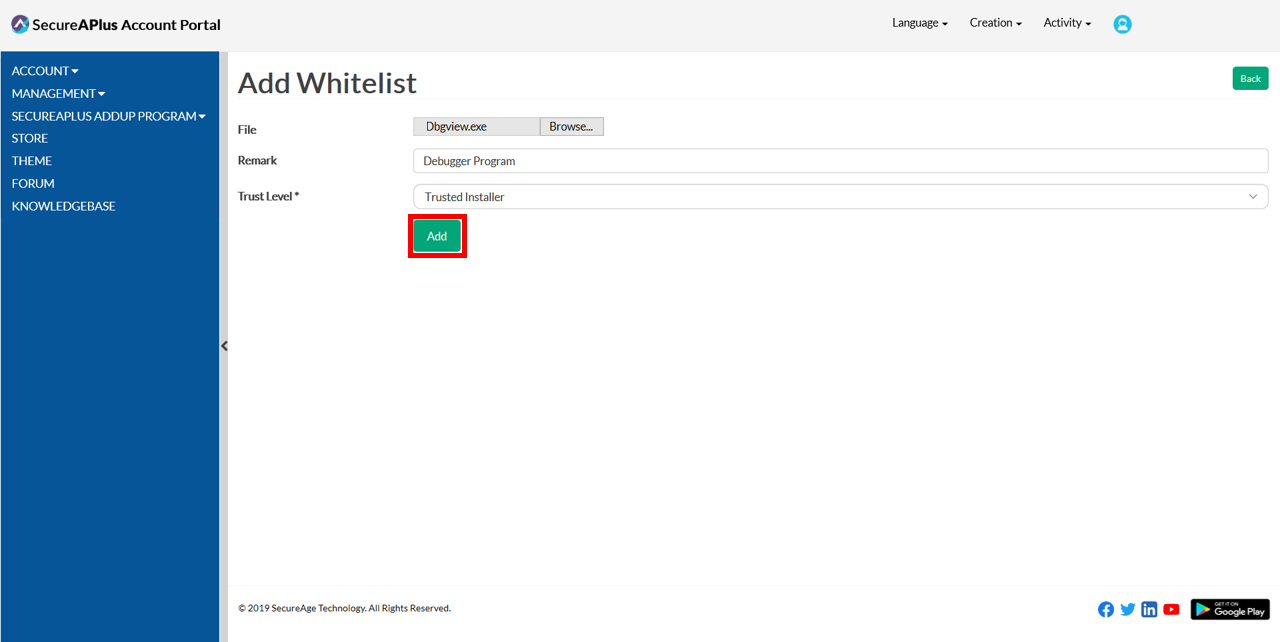
On the Add Whitelist page, click the Browse button to browse for the application or file to be added to the whitelist.
-
Choose the Trust Level for the application or file and enter a remark (optional).

-
Click on the Add button.
-
The newly added application or file should appear in the approved whitelist.

Editing the trust level of an application or file in the approved whitelist
To edit the trust level of an application or file in the approved whitelist
-
Log in to your SecureAPlus portal.
-
On the SecureAPlus Account Portal Summary page, click on My Approved Whitelist.
-
On the My Approved Whitelist page, you will see your list of approved whitelist.
-
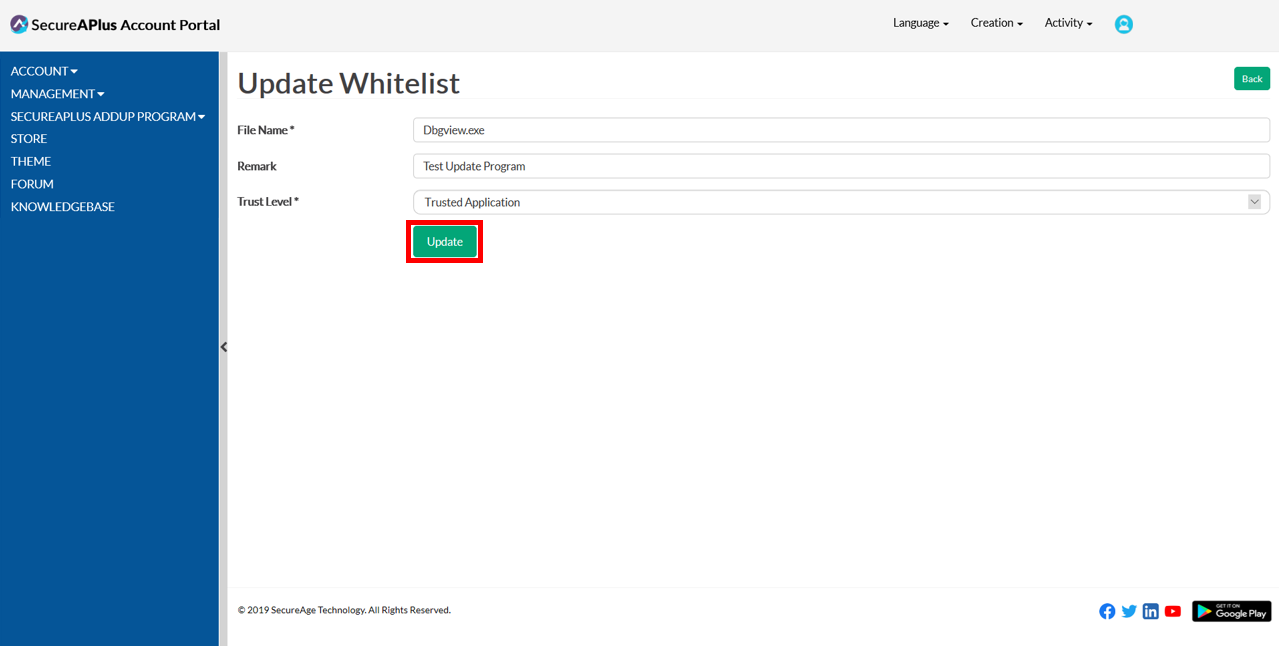
Select an approved application or file from the whitelist by clicking on the file name.

-
On the Update Whitelist page, make the necessary changes to the trust level and click the Update button.
Removing the approved whitelist
To remove the approved whitelist
-
Log in to your SecureAPlus portal.
-
On the SecureAPlus Account Portal Summary page, click on My Approved Whitelist.
-
On the My Approved Whitelist page, you will see your list of approved whitelist.
-
Select the application or file you wish to be deleted from the list and click on the X icon under the Delete column.
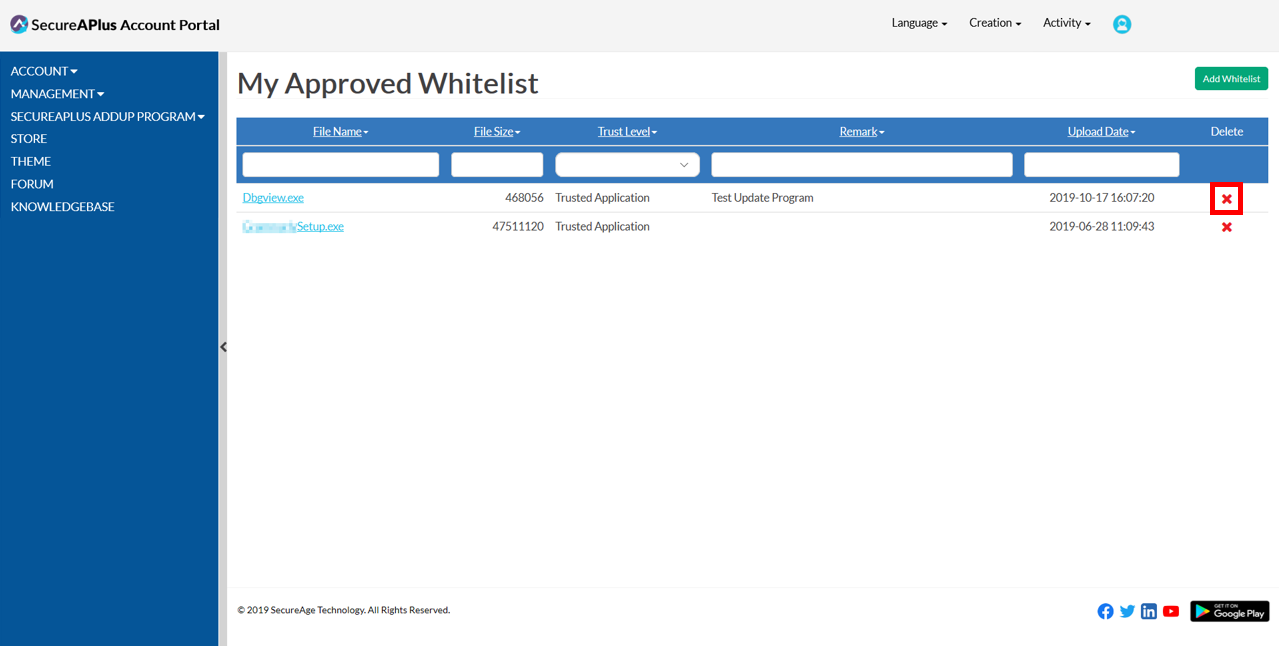
-
You will be prompted to confirm the deletion. Click on OK to remove the application or file from
the approved whitelist.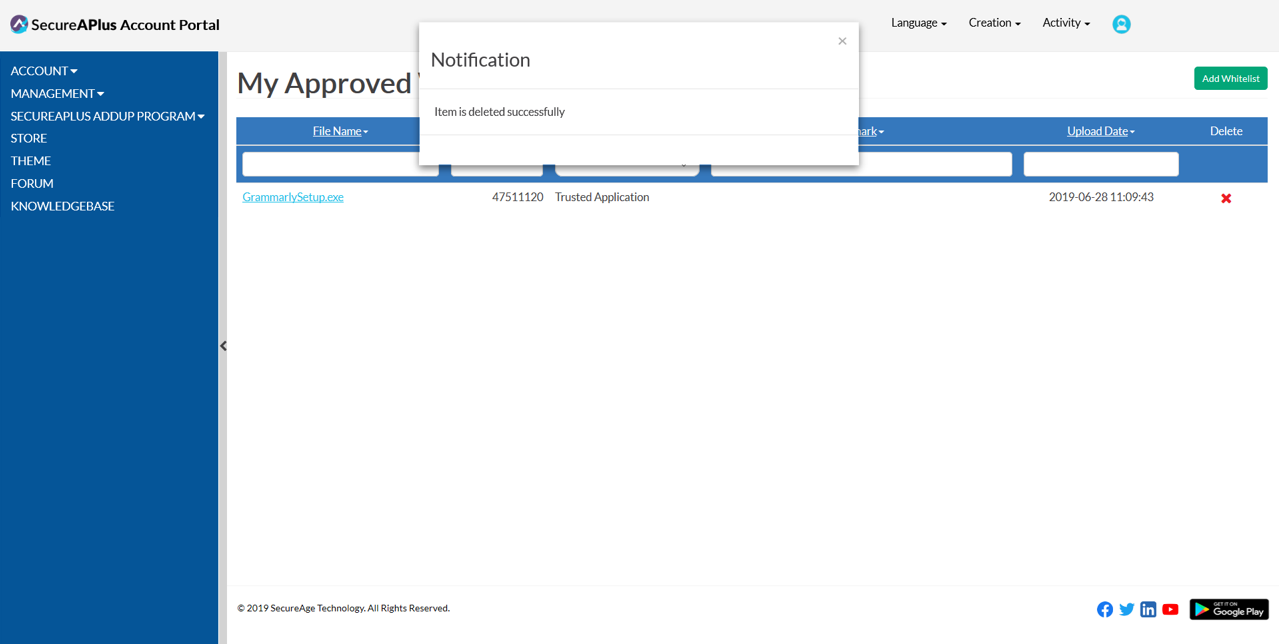

Support and feedback
Should you encounter any issues using SecureAPlus with any of the mentioned or missed requirements above, you can write to us at docs@secureage.com.
This page was last updated: December 02, 2025