Configuring Application Allowlist Settings in CatchPulse Policy
Allowlists enables administrators to manage which applications are permitted to execute on a system. It is a list of approved applications that are authorized to run on user's devices. Allowlisting helps to restrict the execution of unapproved applications, which prevents unauthorized access, data breaches, and other security risks.
Jump to:
Adding an Application Allowlist
This section describes how to trust an application by establishing it as a Trusted Installer or Trusted App. This allows administrators to ensure that authorized applications can run securely on end users' computers without being blocked.
To add an Application Allowlist
-
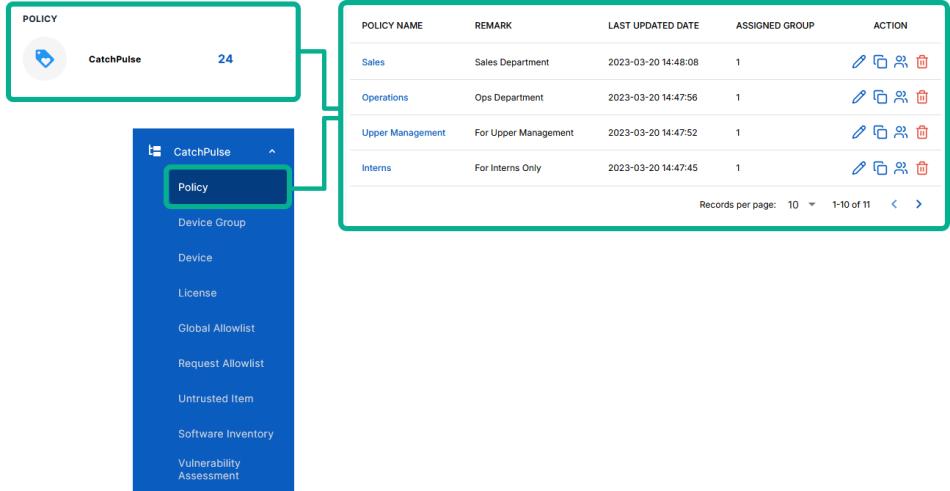
From the main navigation bar, go to CatchPulse → Policy.
-
Do one of the following:
-
To create a new policy with a specified Application Allowlist, click on the Add Policy button located in the top right corner of the Policy page, or
-
To edit the Application Allowlist to an existing policy, select a policy and click on the corresponding
 button.
-
-
On the Policy page, under Manage → Application Allowlist.
-
Click Add Entry from the top right corner of the Application Allowlist page.
-
In the Add Application Allowlist display box,
-
Choose an application
-
Trust Level - Choose between Trusted Application or Trusted Installer.
-
Remark - This is an optional field for a brief description of the Allowlist. You can document the intent, scope, or specific details of what the allowlist is about.
-
-
Select Add to add an Application Allowlist.
The notification panel at the bottom of the page indicates the Application Allowlist was added successfully.
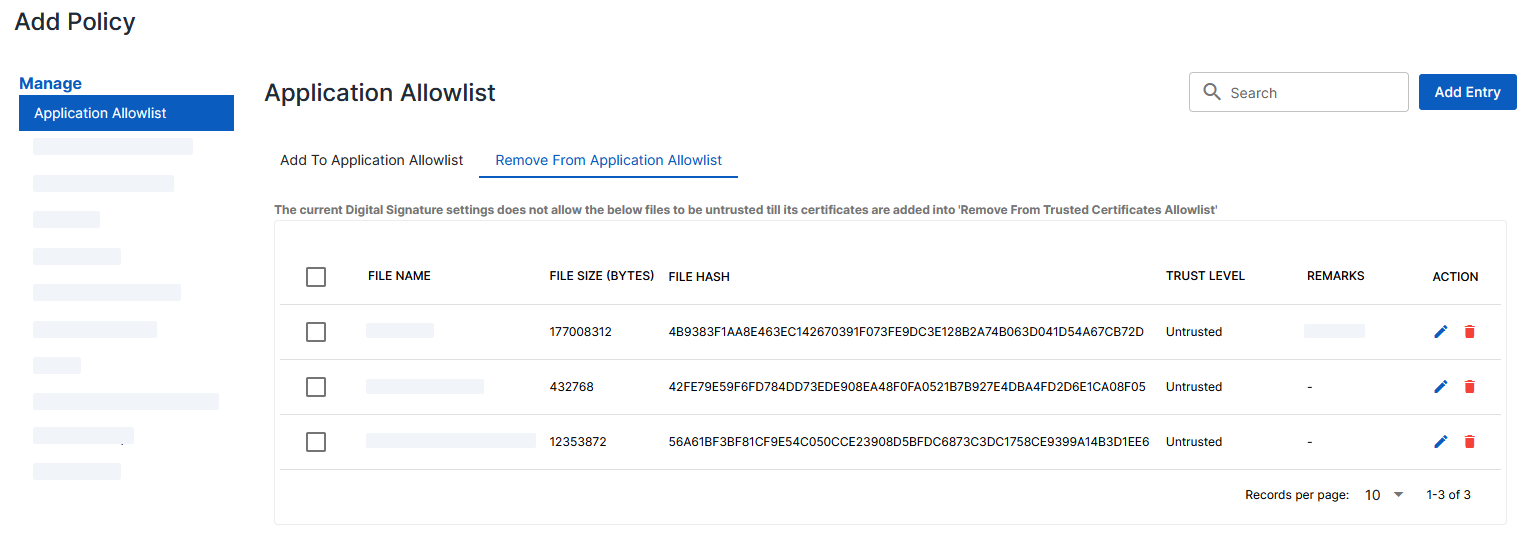
Removing from Application Allowlist
The Remove from Application Allowlist option allows you to establish an application as untrusted, effectively blocking it. However, the outcomes may vary based on whether the Digital Signature (Settings → Digital Signature) setting is enabled and how it is configured.
Key Scenarios
Digitally Signed Applications
A digitally signed application is one that includes a code signing certificate, which is used to prove the authenticity of the application. You can check this by: Right-click the file > Properties > Digital Signatures. If a signature appears in the list, the application is digitally signed.
-
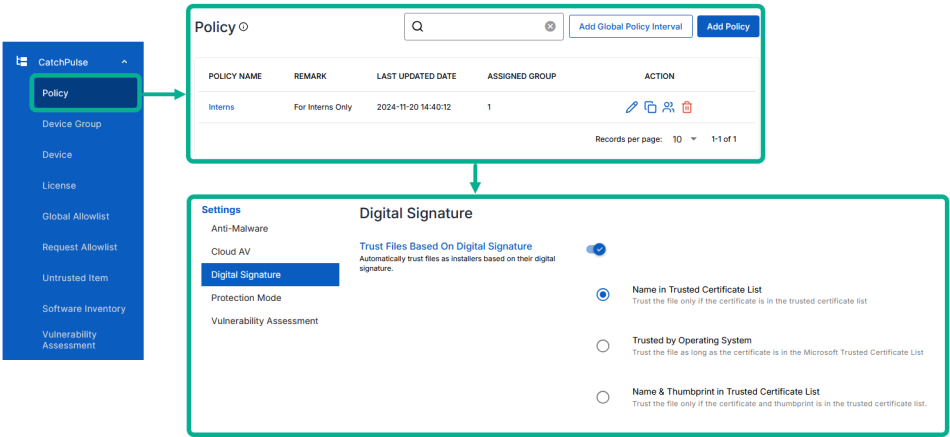
Trust Files Based on Digital Signature + Name in Trusted Certificate List enabled
To block the application:
-
Add the application to Remove from Application Allowlist, and
-
Add the application’s code signing certificate to Trusted Certificate Allowlist → Remove from Trusted Certificate Allowlist.
-
-
Trust Files Based on Digital Signature + Trusted by Operating System enabled
If the application’s code signing certificate is included in Microsoft’s Trusted Certificate List, you will not be able to block it. In this case, consider using another option such as:
-
Name in Trusted Certificate List
-
Name & Thumbprint in Trusted Certificate List or
-
Disabling Trust by Digital Signature.
However, if the application’s code signing certificate is not in the Microsoft Trusted Certificate List, add the application to Remove from Application Allowlist.
-
-
Trust Files Based on Digital Signature + Name & Thumbprint in Trusted Certificate List enabled
To block the application:
-
Add the application to Remove from Application Allowlist, and
-
Add the application’s code signing certificate to Trusted Certificate Allowlist → Remove from Trusted Certificate Allowlist.
-
-
Trust Files Based on Digital Signature disabled
Add the application to Remove from Application Allowlist to block it.
Non-Digitally Signed Applications
For applications without a digital signature, add the application to Remove from Application Allowlist to block it. This works regardless of the Digital Signature settings.
As such, to block an item, first identify which mode of Digital Signature to use and then configure with the right policy configuration.
Note: To ensure blocking works as intended, even for Windows administrators, ensure the Administrators group is removed from Trusted Group. For details, see the Trusted Groups and Trusted Users.
To remove Trusted Application Allowlist
Note: To ensure effective removal from the application allowlist, refer to the key scenarios section above
-
From the main navigation bar, go to CatchPulse → Policy.
-
Select a policy and click on the corresponding
button. -
On the Policy page, under Manage → Application Allowlist.
-
Do one of the following:
-
If the application is listed in the Add to Application Allowlist grid:
-
Select the Application from the grid, click on the corresponding
button. -
In the Edit Application Allowlist dialog box, set Trust Level to Untrusted.
-
Click Save.
A notification panel at the bottom of the page confirms the update
-
-
If the application is not listed in the Add to Application Allowlist grid:
-
Click Add Entry at the top right corner of the Application Allowlist page.
-
In the Add Application Allowlist dialog box, choose the application.
-
Set Trust Level to Untrusted.
-
(Optional) Enter a Remark to describe the purpose or scope of this entry.
-
Click Save.
A notification panel at the bottom of the page confirms the update
-
-
Deleting an Application Allowlist
To delete an Application Allowlist
-
From the main navigation bar, go to CatchPulse → Policy.
-
Select a policy and click on the corresponding
button. -
On the Policy page, under Manage → Application Allowlist.
-
Choose either Add To Application Allowlist or Remove From Application Allowlist tab.
-
Select an Application Allowlist and click on the corresponding
 button.
 -
When prompted to delete an Application Allowlist, select Delete.
The notification panel at the bottom of the page indicates the Trusted Certificate was deleted.
Note: Deleting the application allowlist from the grid simply removes the entry from the corresponding tabs.
If you deleted the Application Allowlist in the Add To Application Allowlist tab, it means that the application is no longer configured explicitly as an allowed application when the user receives the policy. However, note that for users who have already trusted/ allowed it, it will remain unchanged. For users who have not run it, the usual allowlisting logic will take place.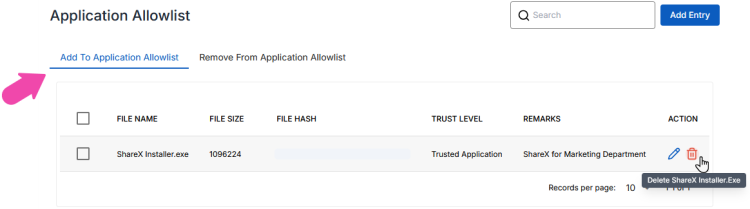
If you deleted the Application Allowlist in the Remove From Application Allowlist tab, it means that the application is no longer configured explicitly as a Untrusted Application. Now, for any users running it, the usual allowlisting logic will take place.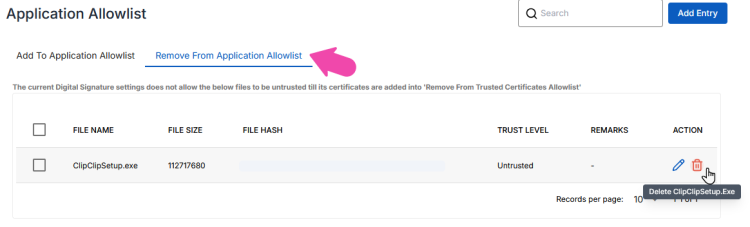
More information
Support and feedback
Should you encounter any issues using the SecureAge Central with any of the mentioned or missed requirements above, you can always write to us a docs@secureage.com.
This page was last updated: May 07, 2026