Configuring Restricted Application Settings in CatchPulse Policy
In SecureAge Central, you can control the behaviour of applications in CatchPulse that download, extract, or copy files from external sources.
By default, CatchPulse trusts files with valid digital signatures, automatically designating them as trusted installers, which could unintentionally allow harmful applications to gain trust without user intervention.
To prevent automatic trust assignment to newly created executable files, mitigate the risk by adding applications to the Restricted Applications list. This will ensure that potentially harmful applications are not unintentionally granted trust.
For instance, Google Chrome, known for its file downloading capabilities, poses such a risk, as its signed status could lead to automatic trust designation for its executables; hence, administrators would need to add chrome.exe to the Restricted Applications List to prevent this automatic trust assignment and maintain system security.
Jump to:
Disabling using Default Restricted Application
Adding New User-Defined Restricted Application
Deleting User Defined Restricted Application
Disabling using Default Restricted Application
To disable using Default Restricted Application
-
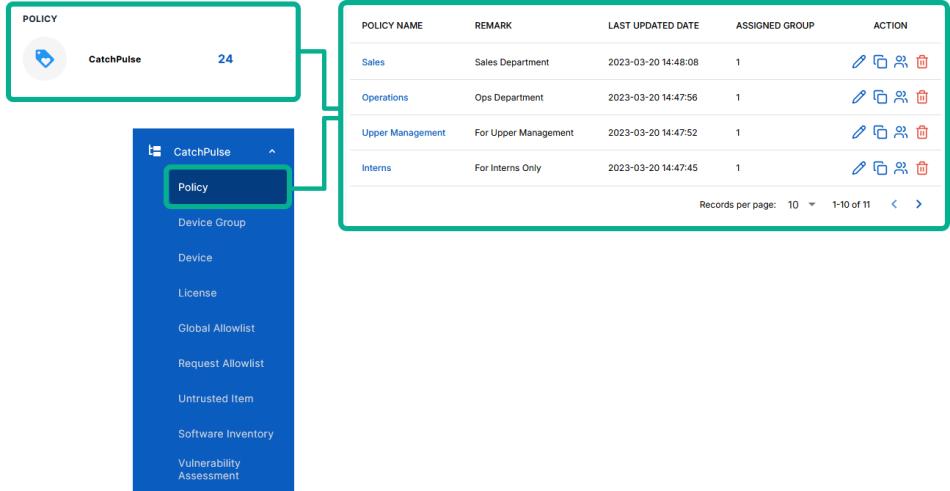
From the main navigation bar, go to CatchPulse → Policy.
-
Do one of the following:
-
To disable using Default Restricted Application in a new policy, click on the Add Policy button located at the top right corner of the Policy page, or
-
To disable using Default Restricted Application from an existing policy, select a policy and click on the corresponding
 button.
-
-
On the Policy page, under Manage → Restricted Application.
-
Turn off Use Default Restricted Application switch.
Adding New User-Defined Restricted Application
To add New User Defined Restricted Application
-
From the main navigation bar, go to CatchPulse → Policy.
-
Do one of the following:
-
To add a new User-Defined Restricted Application in a new policy, click on the Add Policy button located at the top right corner of the Policy page, or
-
To add a New User Defined, select a policy and click on the corresponding
button.
-
-
On the Policy page, under Manage → Restricted Application.
-
Click Add New User-Defined from the top right corner of the Restricted Application page.
-
On the New Restricted Application display box, enter the restricted application name.
-
(Optional) Select Add another to continue adding more Restricted Applications.
-
Click Add to add Restricted Application.
The notification panel at the bottom of the page indicates the Restricted Application was added successfully.
Deleting User Defined Restricted Application
To delete User Defined Restricted Application
-
From the main navigation bar, go to CatchPulse → Policy.
-
Select a policy and click on the corresponding
button. -
On the Policy page, under Manage → Restricted Application.
-
Under the User-Defined Restricted Application tab, select a Restricted Application and click on the corresponding
 button.
 -
When prompted to remove the selected Restricted Application, select Delete.
The notification panel at the bottom of the page indicates the Restricted Application was deleted.
More information
Support and feedback
Should you encounter any issues using the SecureAge Central with any of the mentioned or missed requirements above, you can always write to us a docs@secureage.com.
This page was last updated: May 07, 2026