CatchPulse Settings
Jump to
Anti-Malware
To configure Anti-Malware Settings in SecureAge Central
-
From the main navigation bar, go to CatchPulse → Policy.
-
Do one of the following:
-
Click Policy from the top right corner of the Policy page, or
-
Select a policy and click on the corresponding
 button.
-
-
On the Policy page, under Settings → Anti-Malware.
-
Set up the Anti-Malware settings according to the table below.
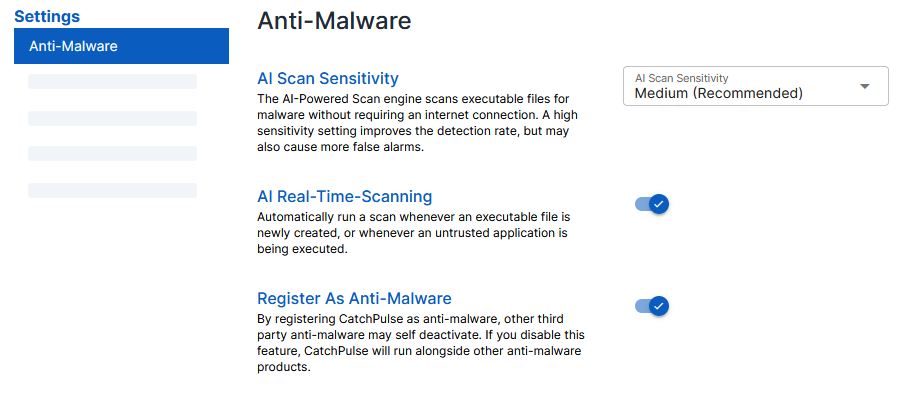
PROPERTY DESCRIPTION AI Scan Sensitivity
Use the dropdown menu to select your preferred sensitivity level:
-
Low: Reduces false alarms but may lower detection rates.
-
(Recommended Setting) Medium: This option strikes a balance between detection accuracy and minimizing false alarms.
-
High: Increases detection rates but may also cause more false alarms.
AI Real-Time-Scanning
Toggle the switch to enable real-time scanning (blue indicates it’s enabled).
This option automatically scans any newly created or executed executable files to detect potential threats.
Register As Anti-Malware
Toggle the switch to enable registration (blue indicates it’s enabled).
Enabling this setting allows the system to act as the primary anti-malware, which may deactivate other third-party anti-malware software. If you prefer to run this system alongside other anti-malware products, you can disable this setting.
-
-
Select Add Policy or Update Policy to save changes.
The notification panel at the bottom of the page indicates the policy was added or saved.
Cloud AV
To configure Cloud AV Settings in SecureAge Central
-
From the main navigation bar, go to CatchPulse → Policy.
-
Do one of the following:
-
Click Policy from the top right corner of the Policy page, or
-
Select a policy and click on the corresponding
button.
-
-
On the Policy page, under Settings → Cloud AV.
-
Set up the Cloud AV settings according to the table below.
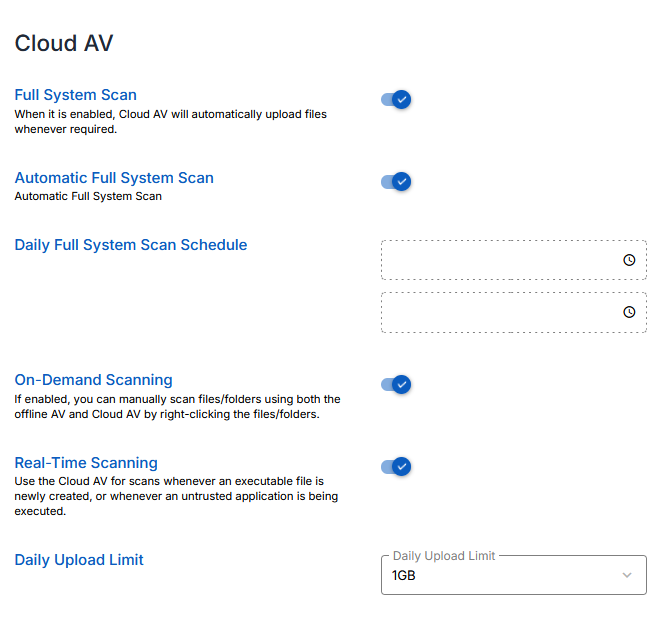
PROPERTY DESCRIPTION Full System Scan
Toggle the switch to enable Full System Scan (blue indicates it’s enabled).
When enabled, Cloud AV will automatically upload files for scanning whenever required.
Automatic Full System Scan
Toggle the switch to enable Automatic Full System Scan (blue indicates it’s enabled).
This allows the SecureAge Central to perform a full system scan at scheduled times automatically.
Daily Full System Scan Schedule
Set the time for the full system scan by selecting the desired schedule.
This lets you choose a time when the automatic full system scan will run daily.
On-Demand Scanning
Toggle the switch to enable On-Demand Scanning (blue indicates it’s enabled).
With this option enabled, you can manually scan specific files or folders by right-clicking on them and selecting the Cloud AV or offline AV scan option.
Real-Time Scanning
Toggle the switch to enable Real-Time Scanning (blue indicates it’s enabled).
This allows Cloud AV to scan newly created executable files or untrusted applications as soon as they’re accessed.
Daily Upload Limit
Use the dropdown menu to select the maximum upload limit for the day (e.g., 1GB).
This limit controls the amount of data that can be uploaded to the cloud for scanning within a 24-hour period.
-
Select Add Policy or Update Policy to save changes.
The notification panel at the bottom of the page indicates the policy was added or saved.
Digital Signature
To configure Digital Signature Settings in SecureAge Central
-
From the main navigation bar, go to CatchPulse → Policy.
-
Do one of the following:
-
Click Policy from the top right corner of the Policy page, or
-
Select a policy and click on the corresponding
button.
-
-
On the Policy page, under Settings → Digital Signature.
-
Set up the Digital Signature settings according to the table below.
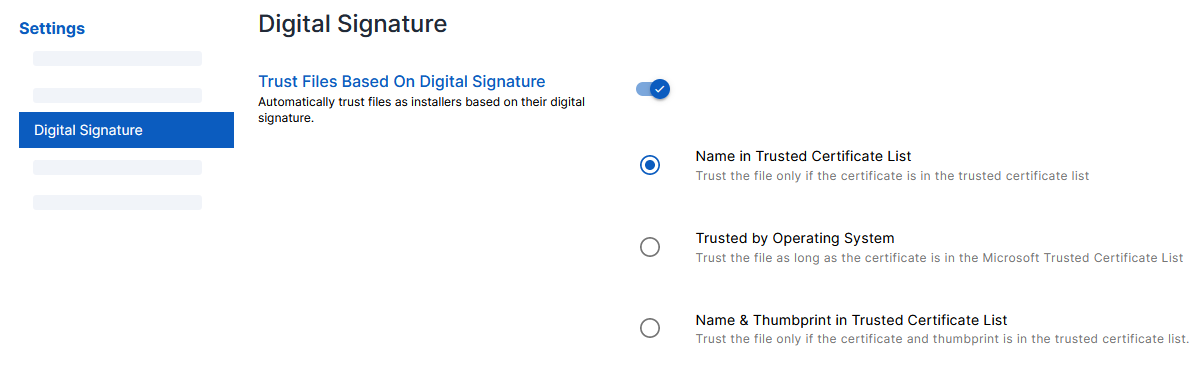
PROPERTY DESCRIPTION Trust Files Based on Digital Signature
Choose one of the following trust criteria options:
-
Name in Trusted Certificate List: Select this option to trust files only if the certificate name matches one in the trusted certificate list.
-
Trusted by Operating System: Select this option to trust files as long as the certificate is in the Microsoft Trusted Certificate List.
-
Name & Thumbprint in Trusted Certificate List: Select this option to trust files only if the certificate name and thumbprint match those in the trusted certificate list.
-
-
Select Add Policy or Update Policy to save changes.
The notification panel at the bottom of the page indicates the policy was added or saved.
Protection Mode
To configure Protection Mode Settings in SecureAge Central
-
From the main navigation bar, go to CatchPulse → Policy.
-
Do one of the following:
-
Click Policy from the top right corner of the Policy page, or
-
Select a policy and click on the corresponding
button.
-
-
On the Policy page, under Settings → Protection Mode.
-
Set up the Protection Mode settings according to the table below.
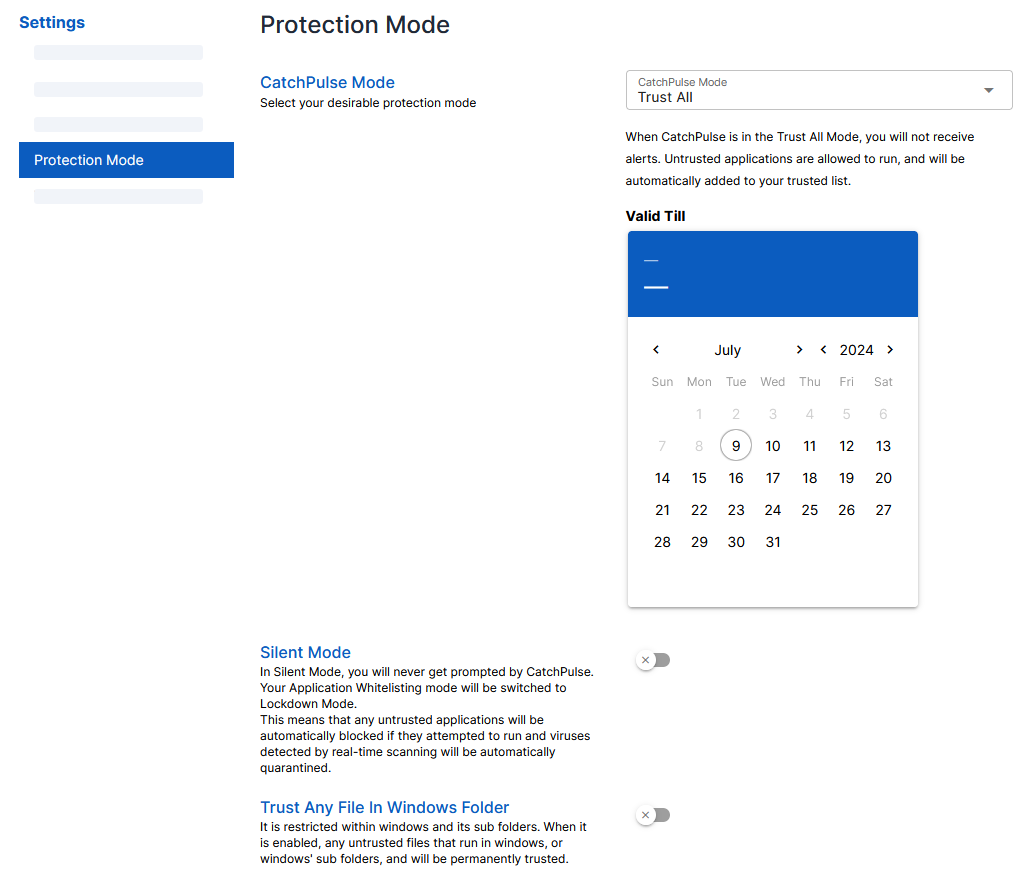
PROPERTY DESCRIPTION CatchPulse Mode
Select your desired protection mode:
-
Trust All: CatchPulse will allow all applications to run without alerts in this mode. Untrusted applications will be added to your trusted list and run automatically.
Note: Choose the expiration date for the duration of this mode's validity.
-
Follow Client Settings: CatchPulse will allow flexibility based on user trust level:
In this mode, trusted users can voluntarily change the protection mode .
If trusted users are set to Interactive or Lockdown mode, non-trusted users will be in Lockdown mode.
-
Observation: In this mode, untrusted applications are allowed to run but are recorded in the log file.
Note: Untrusted applications will remain untrusted when Observation Mode is switched off.
Silent Mode
Toggle the switch to enable Silent Mode (blue indicates it’s enabled).
Enabling Silent Mode ensures you won’t receive prompts from CatchPulse. Any untrusted applications will be blocked automatically, and viruses detected by real-time scanning will be quarantined.
Trust Any File in Windows Folder
Toggle the switch to enable Trust Any File in Windows Folder (blue indicates it’s enabled).
When enabled, untrusted files that run within Windows or its sub-folders will be permanently trusted. This setting is useful if you want to allow specific files in Windows directories to run without restrictions.
Note: To prevent CatchPulse from blocking new Windows files during major updates, temporarily enable the Trust Any File in Windows Folder option.
-
-
Select Add Policy or Update Policy to save changes.
The notification panel at the bottom of the page indicates the policy was added or saved.
Vulnerability Assessment
To configure Vulnerability Settings in SecureAge Central
-
From the main navigation bar, go to CatchPulse → Policy.
-
Do one of the following:
-
Click Policy from the top right corner of the Policy page, or
-
Select a policy and click on the corresponding
button.
-
-
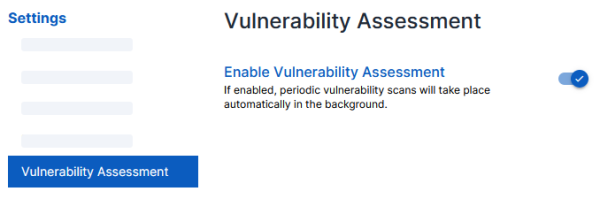
On the Policy page, under Settings → Vulnerability Assessment.
-
Set up the Vulnerability Settings by switching to enable Vulnerability Assessment (blue indicates it’s enabled).
When enabled, the system will automatically perform periodic vulnerability scans in the background to detect and assess potential security weaknesses.
-
Select Add Policy or Update Policy to save changes.
The notification panel at the bottom of the page indicates the policy was added or saved.
More information
Support and feedback
Should you encounter any issues using the SecureAge Central with any of the mentioned or missed requirements above, you can always write to us a docs@secureage.com.
This page was last updated: May 07, 2026