Understand Behaviors of Application Whitelisting
For installer packages that contain multiple executable files, it is recommended to put the package into a common folder and set the folder to be Trusted Application.
For the main installer file to be executed directly, set it as Trusted Installer (Eg: setup.exe) and run.
The prompting depends on the Application Whitelisting settings, by default, it is Trust by Digital Signature if the file is not in the whitelist, but the digital signature has to be listed under the Trusted Certificate list.
Therefore, if a new application has a digital signature that is not found in the list, you will be prompted for further actions.
On-The-Fly Trust
Scenario 1
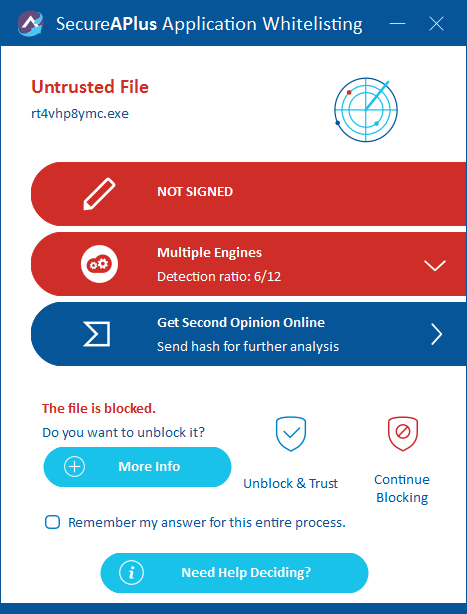
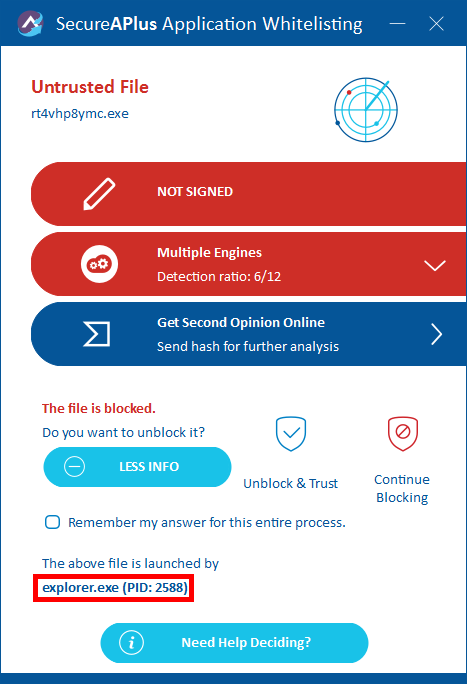
If an untrusted executable file is being run and launched by Windows Explorer, Application Whitelisting will notify for further actions as below:
You will be given the option to Remember my answer for this entire process if you do not want to be prompted again.
However, this option will allow everything that Windows Explorer runs to be trusted automatically.
In doing so, malware run by Windows Explorer will be trusted thus causing it to enter the system.
Note that for the executable file that is not accessible by Windows Explorer, you may not be able to see and manually set the trust level of the files.
Hence, Application Whitelisting on-the-fly trust will allow you to set the appropriate actions for these files when it is being run.
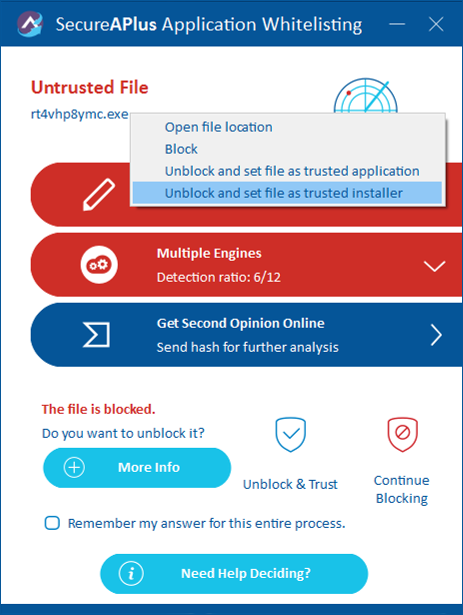
Nevertheless, you are given the options to Unblock and set the file as a trusted installer if you are sure that the installer file can be trusted and do not want to be further prompted by Application Whitelisting.
Setting the file as a trusted installer on-the-fly
To set the file as a trusted installer on-the-fly
-
Right-click on the installer file name and select Unblock and set file as a trusted installer.
-
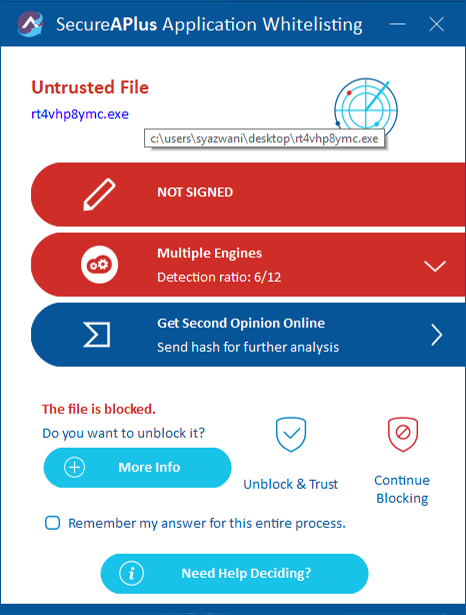
Hovering the mouse in the filename will briefly show the location of the file.
Clicking on it will open a Windows Explorer window of where the file is located.
-
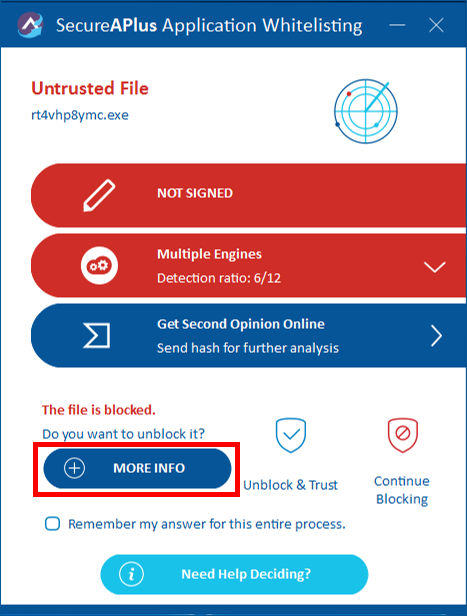
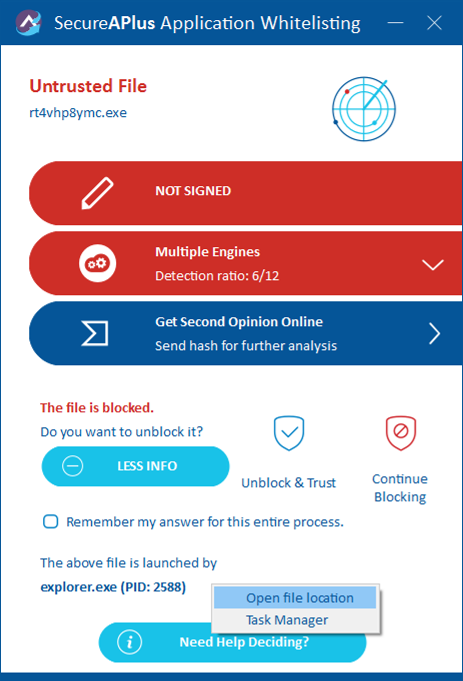
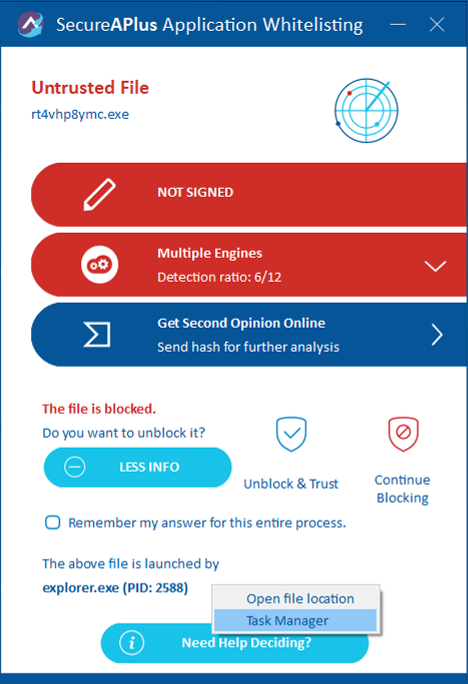
Click on More Info to navigate directly to the location of the process.
-
Right-clicking the process name will display an option to either Open the File Location or open the taskbar to check the process in the Task Manager.
-
Open the file location
-
Task Manager
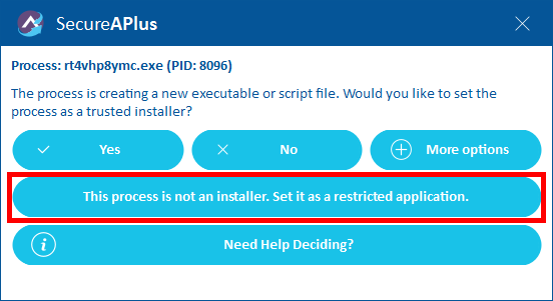
Scenario 2
For Trusted Application which creates new executable files while running, Application Whitelisting will notify for further actions as below:
-
If you do not wish to get any further prompts and you would like anything that is created by the trusted application not to be trusted, click on This process is not an installer. Set it as a restricted application. This will place the application into the list of Restricted Application. You can undo this action by removing the application from the list of Restricted Applications in the settings.
-
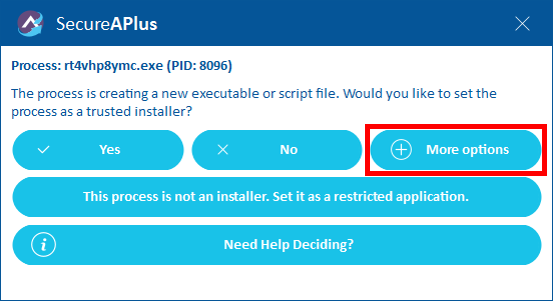
Click on More Options to view more details of the executable.
-
Click on Trust this newly created file only to allow the current freshly created executable file to be elevated to a Trusted Application so that it can be processed. However, the main trusted application will remain the same instead of upgrading into a trusted installer. Therefore, you will still get prompts again if it creates any other new executable files.
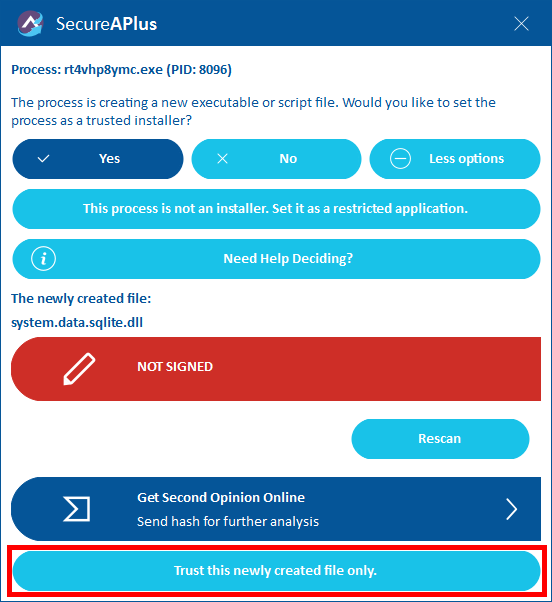
For trusted installers, it will not prompt you for any further actions to elevate the newly created executable files as it will all be automatically set as trusted applications. Therefore, trusted installers can run smoothly as per usual without any unneeded prompting.
Manually trust
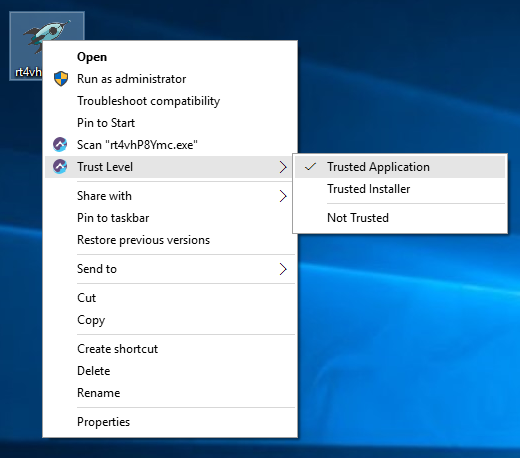
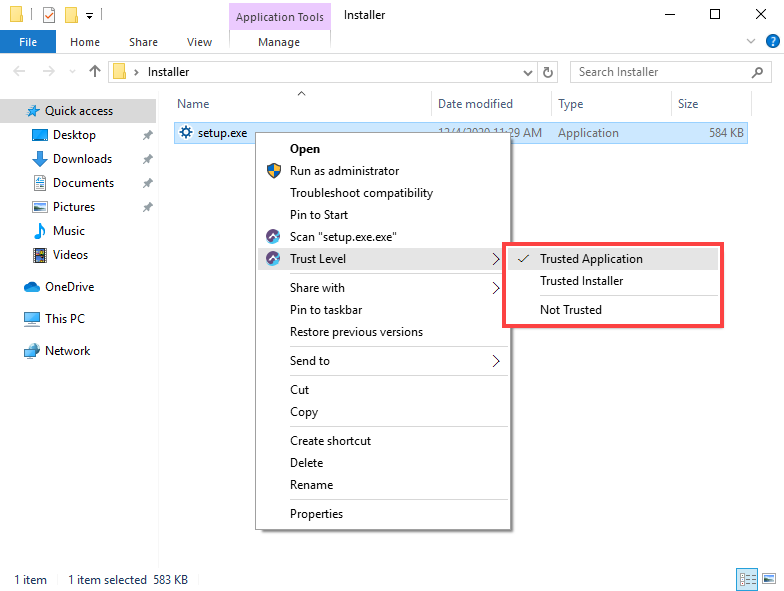
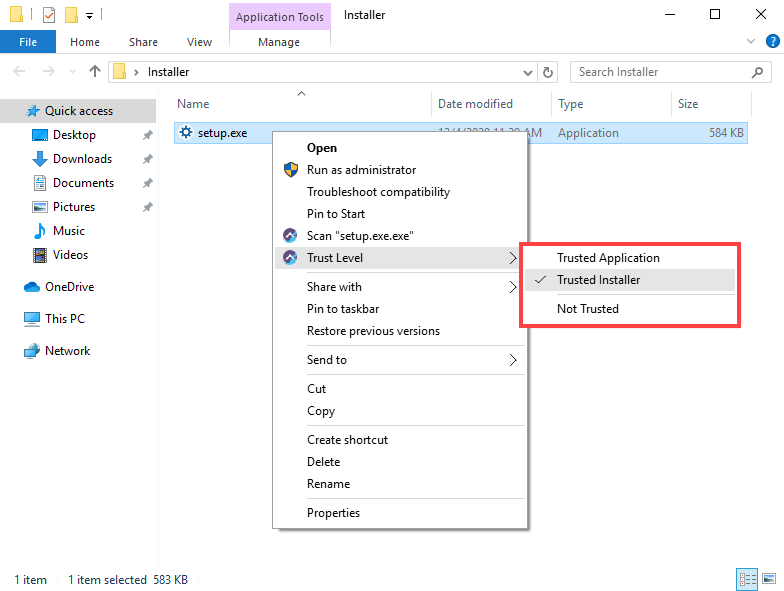
To set the trust levels for your applications manually
-
Right-click on the executable file, point to Trust Level. In the menu displayed, the tick will indicate the trust level of the executable file. Select the desired trust level for the executable file.
-
Right-click on the executable file again, point to Trust Level. In the menu displayed, the tick will indicate the new trust level of the executable file.
-
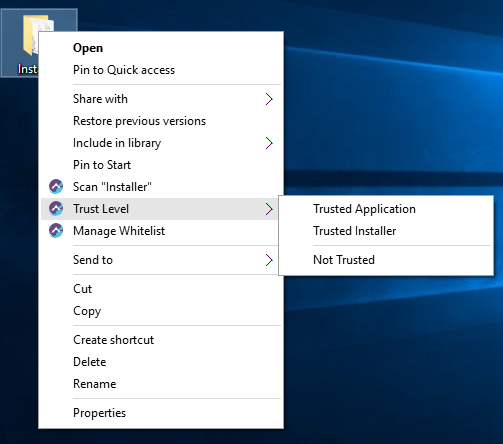
Alternatively, you can also set trust levels for the files within a folder. Right-click on the executable file, point to Trust Level. In the menu displayed, select the desired trust level.
-
Right-click on the folder again, point to Manage Whitelist. A SecureAge Application Whitelisting window will show the new trust level of the files within the folder.

Support and feedback
Should you encounter any issues using SecureAPlus with any of the mentioned or missed requirements above, you can write to us at docs@secureage.com.
This page was last updated: December 02, 2025